Programming the Franzino with an Arduino UNO Board
If you don't have a USB/Serial converter you can program the Franzino through an Arduino. To do this we will configure the Arduino UNO board as a programmer.
First, choose the ArduinoISP example as shown below:
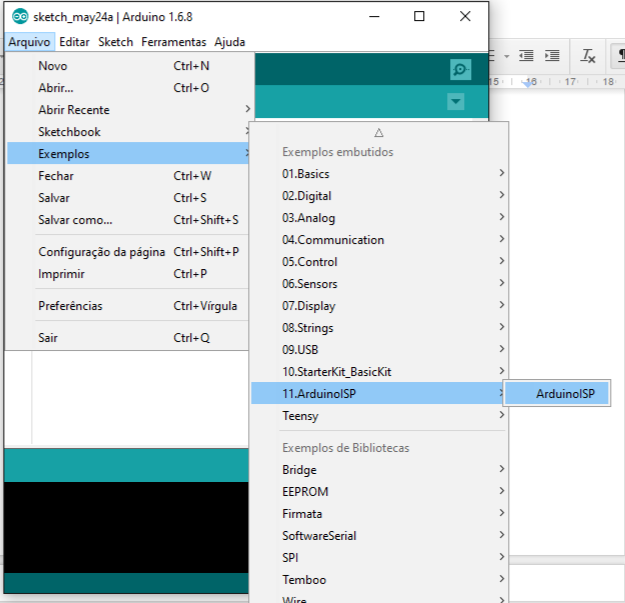
Upload it to the Arduino UNO board that will be used as a programmer.
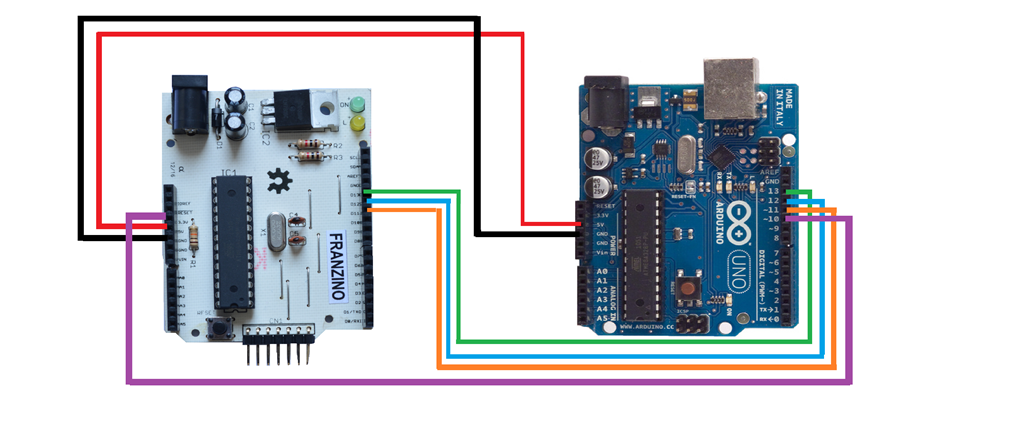
With the upload done, now let's make the connections from the Arduino UNO to the Franzino:
- Connect the FRANZINO RESET pin to pin 10 of the Arduino
- Connect pin 11 of the FRANZINO to pin 11 of the Arduino
- Connect pin 12 of the FRANZINO to pin 12 of the Arduino
- Connect pin 13 of the FRANZINO to pin 13 of the Arduino
- Connect the 5V pin of the FRANZINO to the 5V pin of the Arduino
- Connect the GND pin of the FRANZINO to the GND of the Arduino
Configuring avrdude (if using ATmega328 instead of ATmega328P)
Version 0 of the Franzino comes with the ATmega328-PU, so we need to configure avrdude to program this microcontroller. In the Arduino folder, navigate to:
C:\arduino-1.6.8\hardware\tools\avr\etc, and open the avrdude.conf file.
Look for the ATMEGA328P signature:
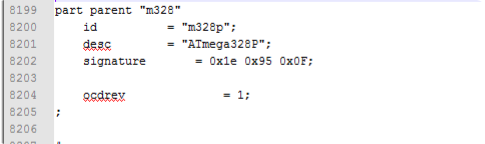
Change the signature to:
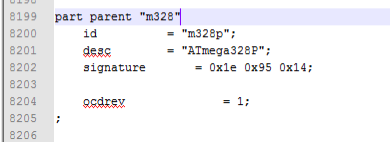
Save the file.
After programming, revert the signature to the original value: signature= 0x1e 0x95 0x0F;
Uploading Sketches Using Arduino UNO
Done — now open the program to be uploaded to the Franzino. For this example we will use the Blink example, but you can follow this procedure to upload your own applications:
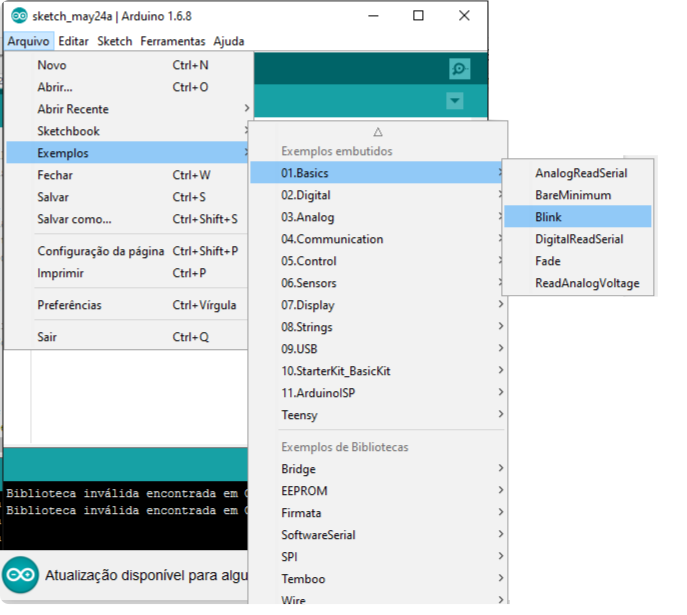
Now prepare for upload. Configure the Programmer as ArduinoISP:
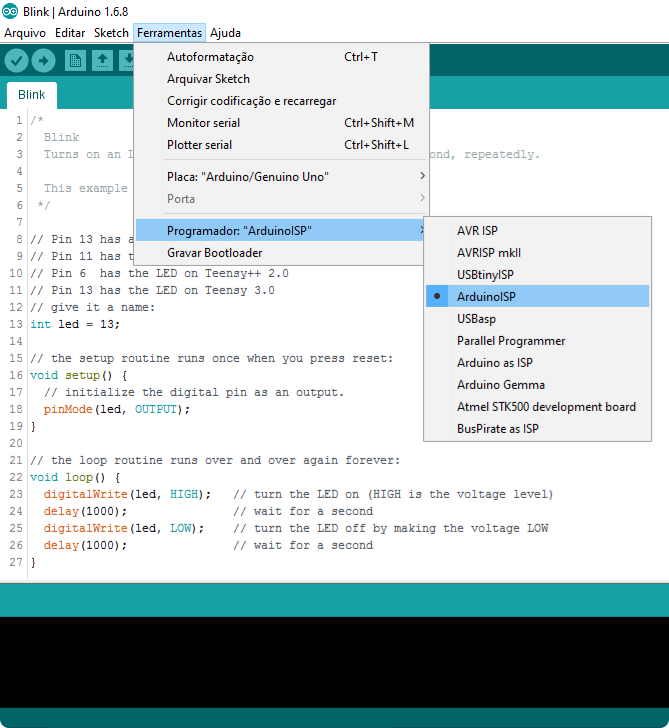
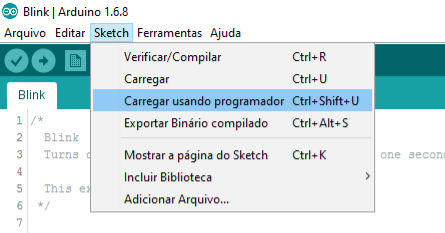
Done — now just UPLOAD to the Franzino: