Getting Started with MicroPython
The Franzininho WiFi is an open-source hardware development board based on the ESP32-S2, created in Brazil. Its main purpose is to make the development of electronic projects more accessible to makers, enthusiasts, and Brazilian developers.
The board can be programmed in several ways, suitable for both beginners and experienced developers.
The Franzininho WiFi can be programmed in various ways, the most common being:
- ESP-IDF, Arduino, CircuitPython, and MicroPython
The Franzininho WiFi LAB01 is an expansion board for the Franzininho WiFi, designed as a laboratory to assist in teaching and learning about the ESP32, based on the Franzininho WiFi. It comes with various onboard resources that make it easier to develop activities and experiments.
In this series of articles, we will explore MicroPython programming with the Franzininho WiFi LAB01. First, it is important to understand that MicroPython is a complete implementation of the Python 3 language to run on embedded hardware.
To program your Franzininho WiFi board with MicroPython, you first need to flash the MicroPython firmware onto it. To simplify the MicroPython installation, we will use a browser-based flashing tool created by the Franzininho community: franzininho.github.io (works in Chrome and similar browsers). We thank Ewerton Sousa for his contribution to this tool.
Below are the steps for flashing MicroPython onto the Franzininho WiFi and the IDE we will use in this series of articles.
Flashing MicroPython onto the Franzininho WiFi
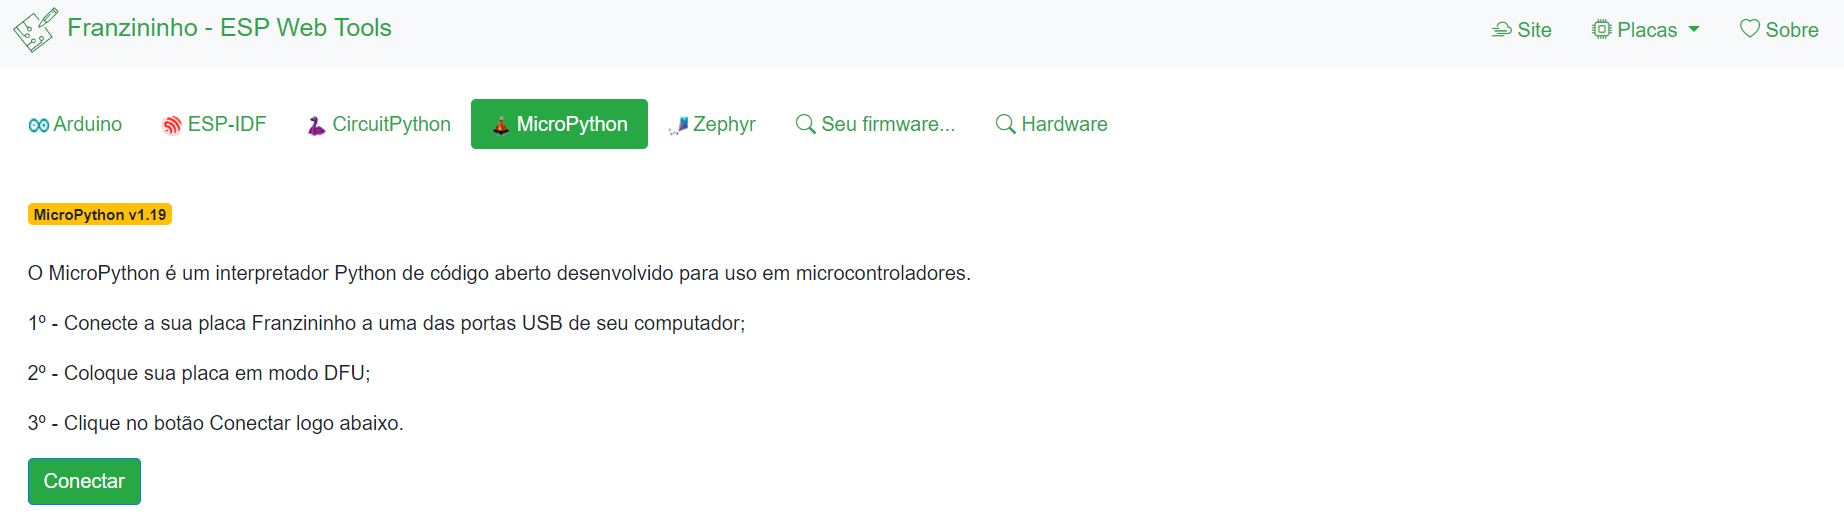
Access the Franzininho – ESP Web Tools tool. With this tool it is possible to obtain not only the MicroPython firmware, but also the firmware for the other software tools the board supports. So, make sure to select the MicroPython tab as shown below:
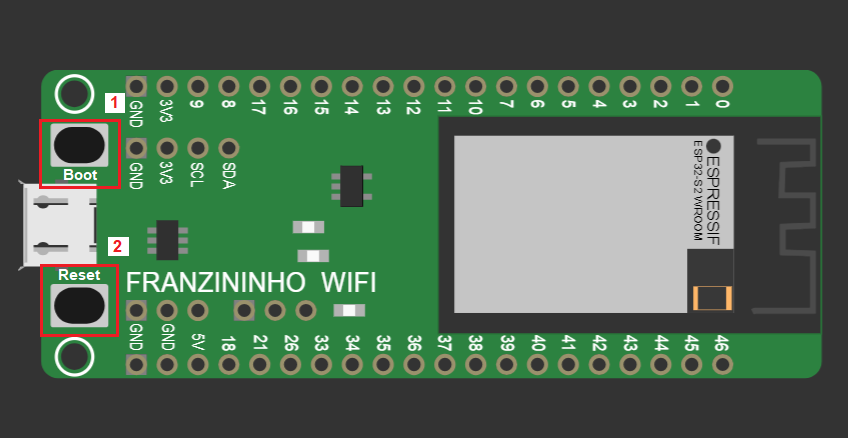
Following the tutorial, start by connecting your Franzininho board to one of your computer's USB ports. Then put your board in DFU mode by performing the following steps:
- Press and hold the boot button;
- Press the reset button;
- After releasing reset, release boot.
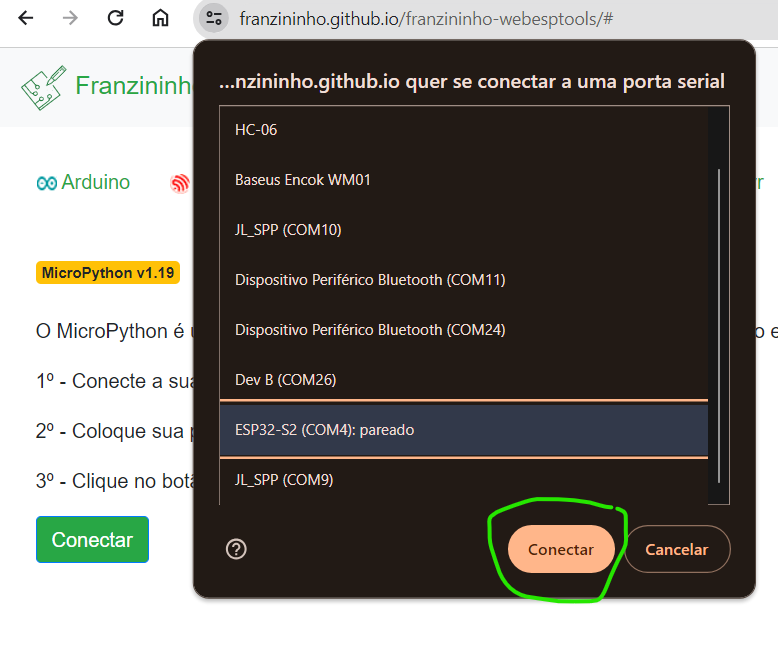
Once done, click the Connect button on the franzininho.github.io site, select the board, and click connect:
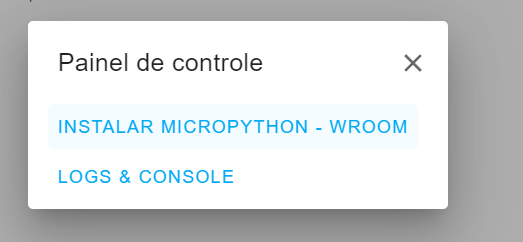
With the board connected, click Install MicroPython:
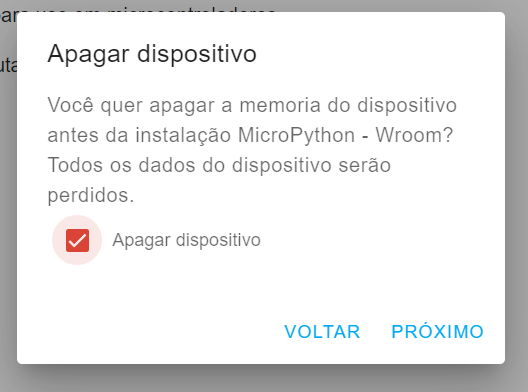
Select the erase device option:
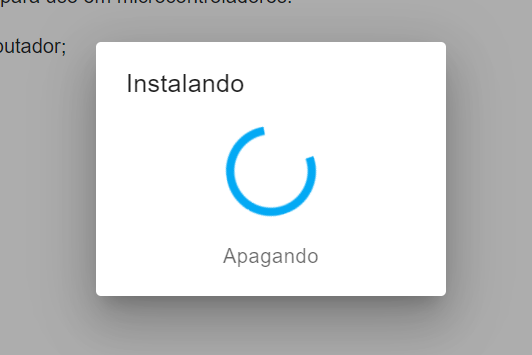
Click Install and wait for the installation to finish (keep the page open until installation is complete):

Once installed, click the reset button again to start MicroPython.
All set — you can now program your Franzininho WiFi LAB01 with MicroPython.
Note: When you put the board in DFU mode, the buzzer may be activated, which can cause unwanted noise. To avoid this, disconnect the buzzer jumper (IO17), which is the first one from left to right.
Introducing Thonny IDE
Thonny is a popular IDE for Python and MicroPython, and it is what we recommend for programming the Franzininho WiFi.
To download, just visit thonny.org and select the download link at the top of the page according to your operating system.
Then start Thonny while the board is still connected via USB. In the bottom-right corner, select the MicroPython (ESP32) option. Thonny will automatically detect the Franzininho WiFi.

Everything is now ready to start your projects with MicroPython on the Franzininho WiFi.
| Author | Sthefania Fernandes |
|---|---|
| Date: | 10/11/2023 |