Getting Started with ESP-IDF
This guide will help you set up the ESP-IDF (Espressif IoT Development Framework) v5.4 to work with the Franzininho WiFi, which uses the ESP32-S2. By the end, you will have compiled, flashed, and monitored the blink example over USB — confirming that the entire environment is working.
Prerequisites
Hardware
- Franzininho WiFi
- USB Micro cable
Software
- Python 3.9 or higher
- Git
- (Linux) No additional drivers needed — the ESP32-S2 uses native USB
- (Windows/macOS) See Step 1 for system-specific prerequisites
Introduction
In this setup, we will install ESP-IDF and use it through the command line. If you prefer to use ESP-IDF integrated into an IDE such as VS Code or Eclipse, check out the following links:
You can install ESP-IDF on your preferred operating system (Linux, Windows, macOS).
Step 1 - Installing Prerequisites
Some tools must be installed on your computer before proceeding. Follow the links below for instructions for your operating system:
It is very important to install all prerequisites before continuing.
Step 2 - Installing ESP-IDF
In this step we will install ESP-IDF v5.4 along with its toolchain and libraries. We will use the official repository maintained by Espressif on GitHub.
ESP-IDF is the official Espressif framework for the entire ESP32 family. This guide focuses on the ESP32-S2 used in the Franzininho WiFi.
Linux and macOS
Open a terminal and run:
mkdir -p ~/esp
cd ~/esp
git clone -b v5.4 --recursive https://github.com/espressif/esp-idf.git
ESP-IDF will be installed at ~/esp/esp-idf.
Windows
The ESP-IDF Tools Installer for Windows from Step 1 also downloads ESP-IDF. If you used the installer, you can skip the repository clone step.
If you prefer to download it manually, follow these instructions.
Installing ESP-IDF Tools
In addition to ESP-IDF itself, you also need to install the tools it depends on: compiler, debugger, Python packages, etc.
Windows: The ESP-IDF Tools Installer installs all required tools automatically. To install manually, open the Command Prompt:
cd %userprofile%\esp\esp-idf
install.bat
Or in Windows PowerShell:
cd ~/esp/esp-idf
./install.ps1
Linux and macOS:
cd ~/esp/esp-idf
./install.sh
Or if you use Fish shell:
cd ~/esp/esp-idf
./install.fish
Setting Environment Variables
The installed tools are not yet on the PATH. You need to load the setup script to use them from the command line.
Windows: The ESP-IDF Tools Installer creates an "ESP-IDF Command Prompt" shortcut in the Start Menu that configures all variables automatically. To configure manually:
# Command Prompt
%userprofile%\esp\esp-idf\export.bat

# Windows PowerShell
.$HOME/esp/esp-idf/export.ps1
Linux and macOS:
. $HOME/esp/esp-idf/export.sh
Or for Fish shell (version 3.0.0 and above):
. $HOME/esp/esp-idf/export.fish
You must run export.sh every time you open a new terminal before using ESP-IDF.
To avoid typing the full path every time, add an alias to your ~/.bashrc or ~/.zshrc:
alias get_idf='. $HOME/esp/esp-idf/export.sh'
Then just type get_idf in any terminal to activate ESP-IDF.
Step 3 - Creating and Configuring the Project
Now that the environment is installed, let's use the blink example to validate everything.
Copying the Example Project
Copy the blink project to preserve the original inside the IDF folder:
Windows:
cd %userprofile%\esp
xcopy /e /i %IDF_PATH%\examples\get-started\blink blink
Linux and macOS:
cd ~/esp
cp -r $IDF_PATH/examples/get-started/blink .
ESP-IDF does not support spaces in project paths. Use only letters, numbers, hyphens, and underscores in directory names.
Identifying the USB Port
Connect the Franzininho WiFi to your computer and check which port it appears on:
Linux:
ls /dev/ttyACM*
The ESP32-S2 with USB CDC typically shows up as /dev/ttyACM0.
macOS:
ls /dev/cu.usbmodem*
Windows: Open Device Manager and look under "Ports (COM & LPT)".
Note the port — you will need it in Step 4.
Configuring via menuconfig
Set the target and open menuconfig:
Windows:
cd %userprofile%\esp\blink
idf.py set-target esp32s2
idf.py menuconfig
Linux and macOS:
cd ~/esp/blink
idf.py set-target esp32s2
idf.py menuconfig
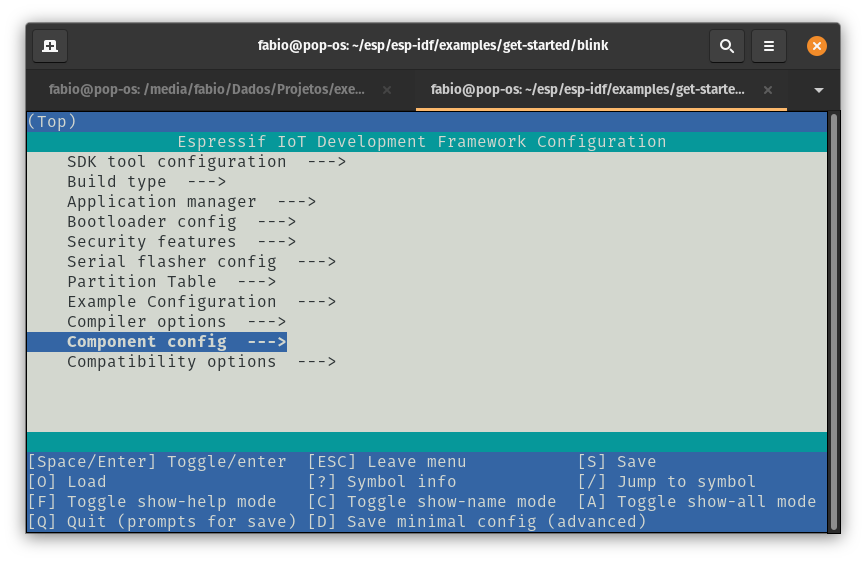
The menuconfig interface will open:

Navigate to Component config --->
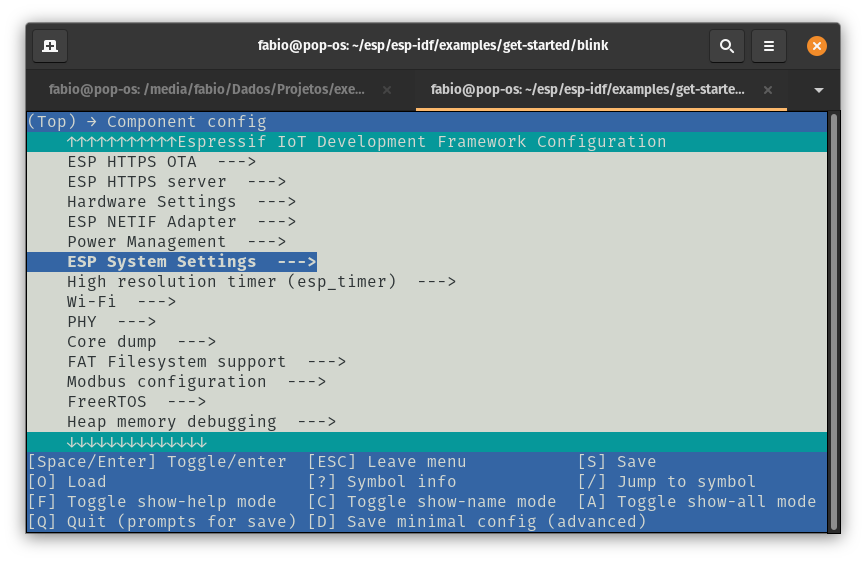
Then ESP System Settings --->
Select Channel for console output (Default: UART0) --->
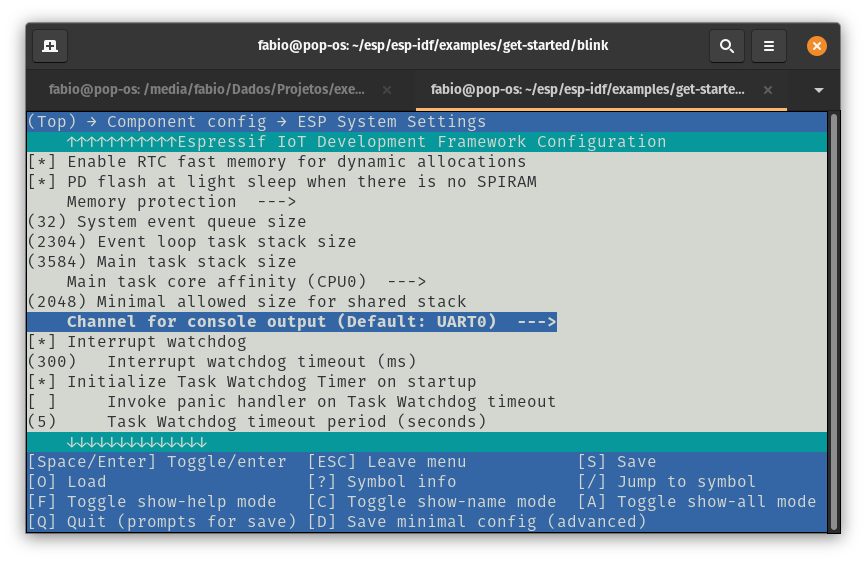
And select (X) USB CDC:

Always set the console to USB CDC for new Franzininho WiFi projects. Without this, the USB port will not work for monitoring or flashing in the normal development workflow.
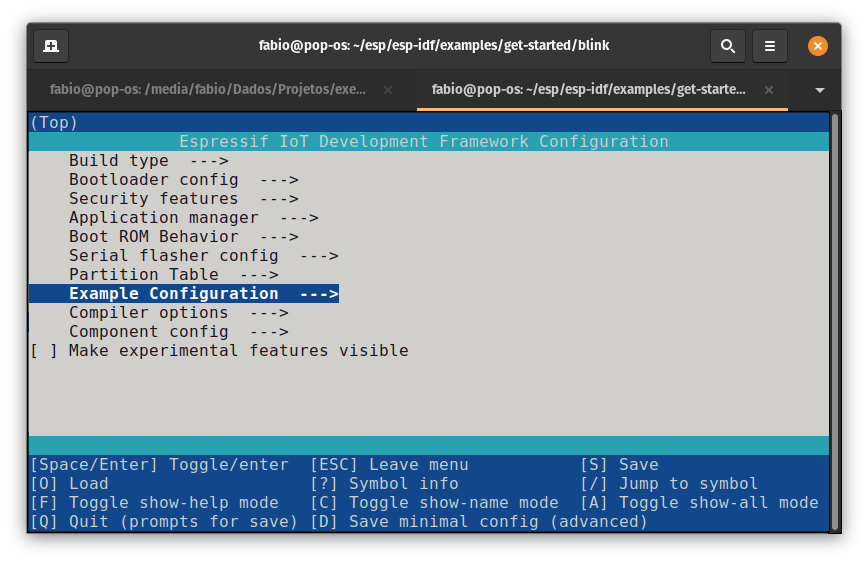
Press ESC to return to the main screen and navigate to Example Configuration --->
Open Blink LED type (...) --->
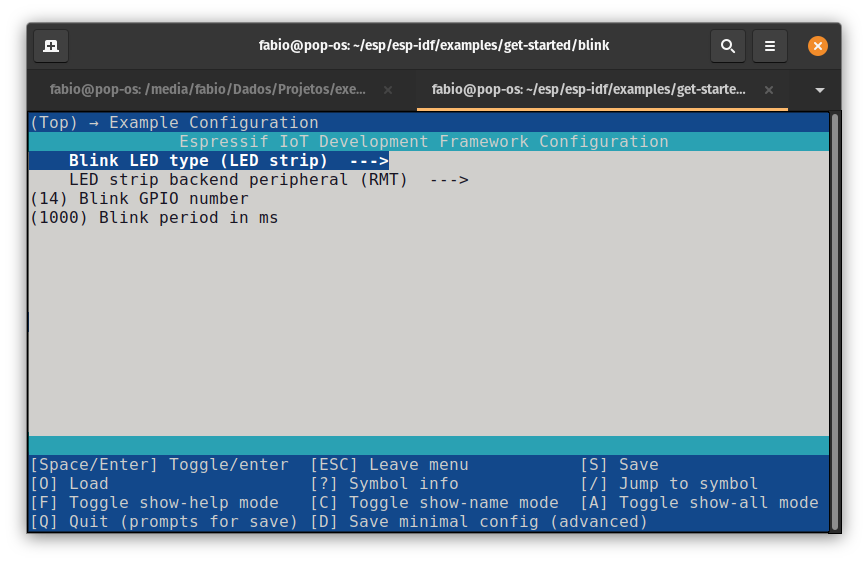
Select GPIO:
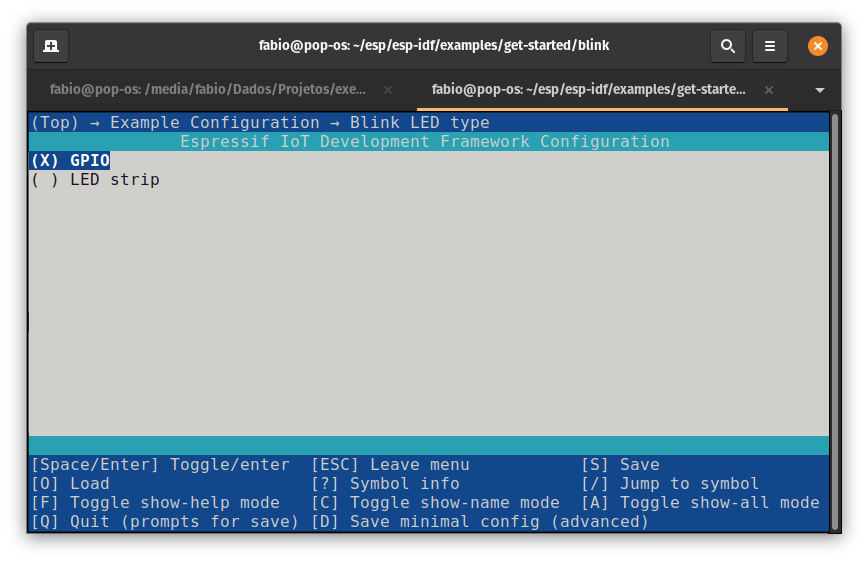
Go back (ESC) and set Blink GPIO number to 21 to control LED21 on the Franzininho WiFi:
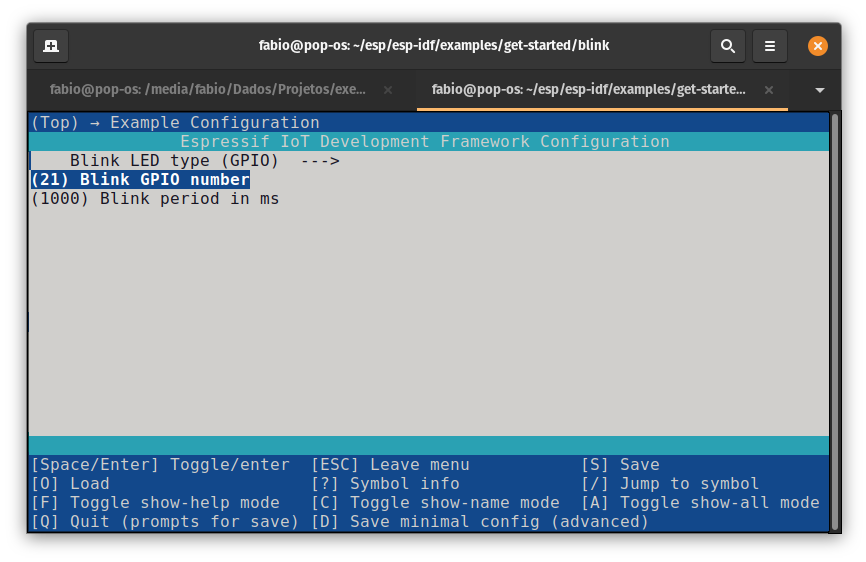
Press Q then Y to exit menuconfig and save the configuration.
For more details on this configuration, watch the video:
Step 4 - Building, Flashing, and Monitoring
The first time you flash the board, you need to enter boot mode manually. Press and hold BOOT, press and release RESET, then release BOOT. From the second flash onward, the process is automatic.
In the commands below, replace /dev/ttyACM0 with the port identified in Step 3. On macOS, use the /dev/cu.usbmodem* path.
Build
idf.py build
Flash
idf.py -p /dev/ttyACM0 flash
Monitor
idf.py -p /dev/ttyACM0 monitor
Press Ctrl+] to exit the monitor.
Build, Flash, and Monitor in One Command
To speed up the development cycle, use the combined command:
idf.py -p /dev/ttyACM0 flash monitor
This command builds (if there are changes), flashes, and opens the monitor all in one step.
Congratulations — your ESP-IDF environment is set up and working with the Franzininho WiFi!
To use the VS Code extension instead, watch the video:
Next Steps
With the environment set up, explore the next example:
- Hello World with ESP-IDF — understand the structure of an ESP-IDF project and its basic components