First Steps with AWS
Introduction
In this tutorial we will explore the use of AWS IoT Core to connect the Franzininho WiFi board to the cloud using ESP-IDF. In addition to IoT Core, AWS offers several other ways to connect a device, such as AWS IoT Greengrass Stream Manager or AWS IoT SiteWise. These other services for data ingestion and visualization can be found at this link.
AWS IoT Core
AWS IoT Core is the message broker that allows IoT devices to connect to the AWS cloud and its various services. Through it, we can create, configure, and manage our devices.
It currently supports the following communication protocols:
- MQTT
- MQTT over WSS (Websockets Secure)
- HTTPS
- LoRaWAN
In summary, the service is based on:
- Things: Devices ("things") that we want to connect;
- Jobs: Remote actions that you can schedule to perform operations on your devices, such as firmware updates;
- Rules: Rules through which we can route messages received by the broker to other AWS services, for example, to store data in DynamoDB.
- Security: where you can manage authorization certificates, policies, and authentication roles.
Part 1 - Creating the Franzininho on AWS
To follow this tutorial, you must have access to the AWS console. To begin, let's create a new "thing" to represent our Franzininho in the cloud. Make sure you are in the closest region before starting by selecting it from the top-right corner menu. For Brazil, the region is sa-east-1.
-
In AWS, look for the IoT Core service (
Service > Internet of Things > IoT Core) and create a new "thing" atManage > All devices > Things > Create new thing. -
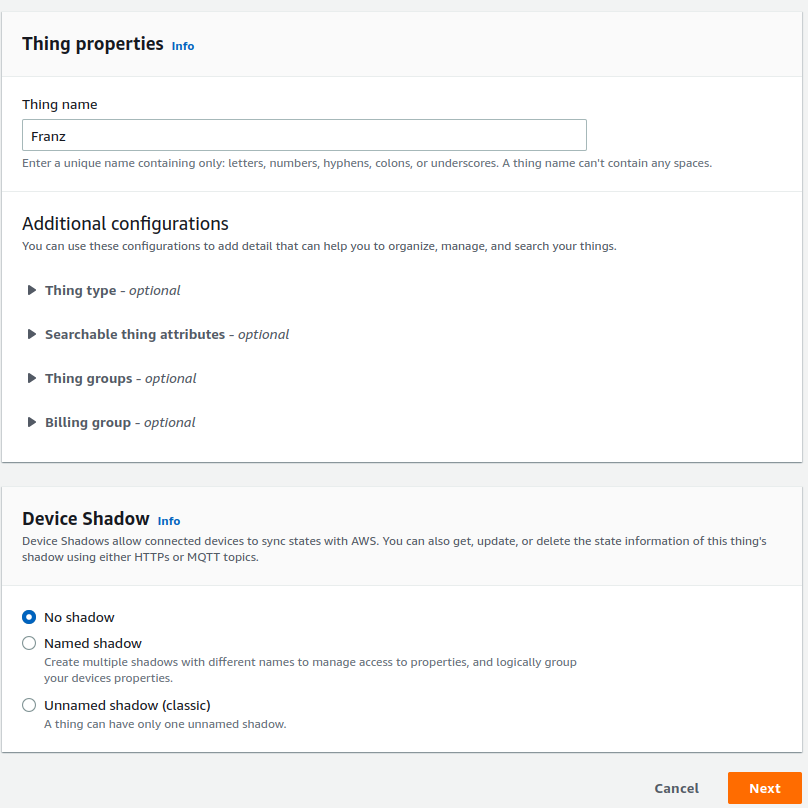
We will create a single device (Create a single thing), but know that it is also possible to create several at once (Create many things). You will need to specify the device properties:
- Thing name: the name of your device to uniquely identify it. Choose wisely, as this property cannot be changed after the device is created.
- Additional settings: can be used to detail, organize, manage, and search devices, such as type, attributes, or groups.
- Device shadow allows your device's state to be available to other services even when it is not connected.
For now, just fill in the name and proceed. I'll affectionately call mine Franz.
-
To be able to authenticate to the AWS service, each device must have a certificate. We will use the auto-generated one (Auto-generate a new certificate), but you also have the option to use your own certificates.
-
To manage the level of access this certificate has to resources, you need to create an authorization policy (policy) — a list of actions allowed or denied for that certificate. You can create a policy directly from this tab under Create policy, or from the IoT Core navigation bar at Security > Policies.
A policy must have a name and one or more statements. Each statement consists of an effect of an action on a resource.
The effect can be permission (allow) or denial (deny).
The possible actions for this service are many, but we will use the following main ones:
- iot:Connect: allows the device to connect to the service;
- iot:Publish: allows the device to publish messages to the broker;
- iot:Receive: allows the device to receive messages from the broker;
- iot:Subscribe: allows the device to subscribe to broker topics.
And the resource is the name of the AWS service that the action will use, in this case arn:aws:iot:region:account-id.
You can add existing policies using the Policy Examples tab or create them manually. For this example, I used the following policies:
{
  "Version": "2012-10-17",
  "Statement": [
    {
      "Effect": "Allow",
      "Action": "iot:Connect",
      "Resource": "arn:aws:iot:sa-east-1:<account-id>:client/${iot:Connection.Thing.ThingName}"
    },
    {
      "Effect": "Allow",
      "Action": "iot:Publish",
      "Resource": "arn:aws:iot:sa-east-1:<account-id>:client/${iot:Connection.Thing.ThingName}"
    },
    {
      "Effect": "Allow",
      "Action": "iot:Subscribe",
      "Resource": "arn:aws:iot:sa-east-1:<account-id>:topicfilter/${iot:Connection.Thing.ThingName}/*"
    },
    {
      "Effect": "Allow",
      "Action": "iot:Publish",
      "Resource": "arn:aws:iot:sa-east-1:<account-id>:topic/${iot:Connection.Thing.ThingName}/*"
    },
    {
      "Effect": "Allow",
      "Action": "iot:Receive",
      "Resource": "arn:aws:iot:sa-east-1:<account-id>:topic/${iot:Connection.Thing.ThingName}/*"
    }
  ]
}
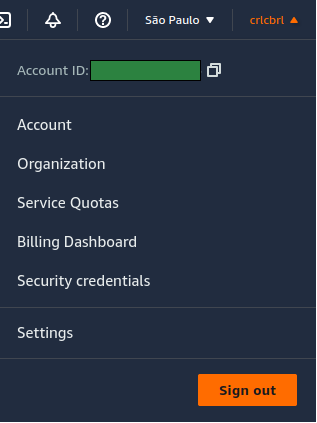
Replace <account-id> with your account number, available from the top-right corner menu.
- Finally, download the certificate and key files that AWS automatically created to authenticate this device. This is the only time you will be able to download the keys for this certificate, so save them carefully to use in the next step.
Part 2 - Connecting the Franzininho with ESP-IDF
Now that we have our device configured, we need to write the firmware to connect it. Espressif itself provides an SDK for AWS IoT communication based on FreeRTOS. To use it, just clone the repository, preferably directly into the components folder of your installation directory.
git clone https://github.com/espressif/esp-aws-iot <esp-dir-path>/esp-idf/components
Inside this component, some examples are already available for use with AWS. Let's start with the basic MQTT example at examples/mqtt/tls_mutual_auth.
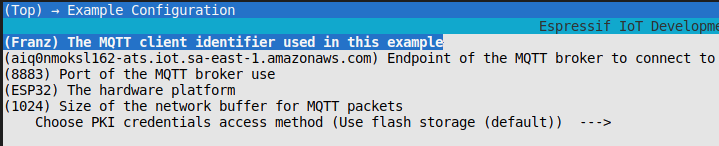
To configure, we will use menuconfig:
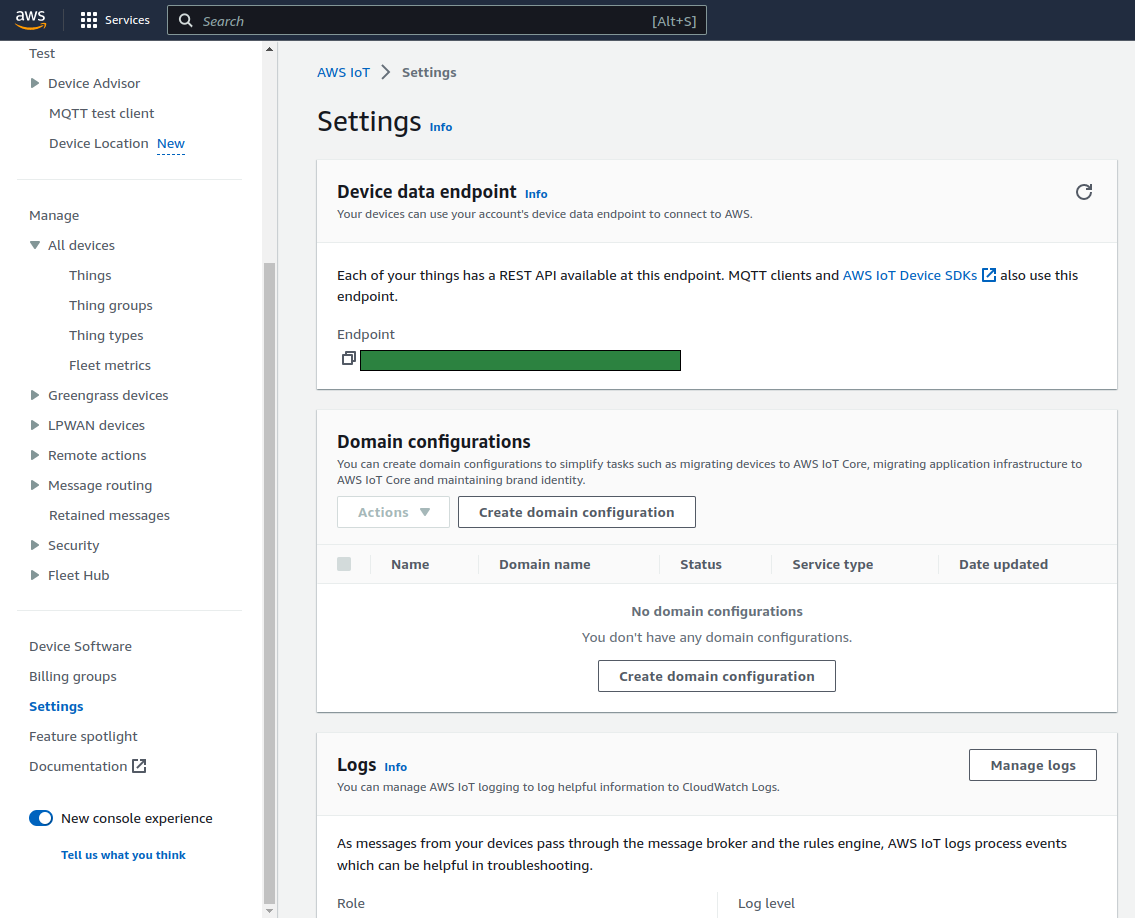
- In the Example Configuration settings, enter the device name exactly as it was created in AWS (Franz, in my case) and the MQTT broker endpoint, which is available in the
AWS IoT > Settings > Device endpointmenu in your AWS account. The remaining settings can be left as default.
-
In the Example Connection Configuration settings, enter your Wi-Fi network settings (SSID and password).
-
The default authentication method with AWS uses PKI credentials embedded in the
certs/directory. Remember the certificates that were automatically generated when creating a device? This is where you place them to embed in the device. Copy the certificate, the private key, and one of the root certificates you had stored earlier.
cp certificate.pem.crt main/certs/client.crt
cp private.pem.key main/certs/client.key
cp AmazonRootCAx.pem main/certs/root_cert_auth.pem
With everything configured, just build and flash to the board (follow the tutorial at Getting Started). This example connects to the MQTT broker, subscribes to the topic CLIENT_IDENTIFIER "/example/topic" (Franz/example/topic, for example), and publishes Hello World messages.
Your connection was established successfully if you receive the following message:
I (7329) coreMQTT: Connection accepted.
I (7339) coreMQTT: Received MQTT CONNACK successfully from broker.
I (7349) coreMQTT: MQTT connection established with the broker.
I (7349) coreMQTT: MQTT connection successfully established with broker.
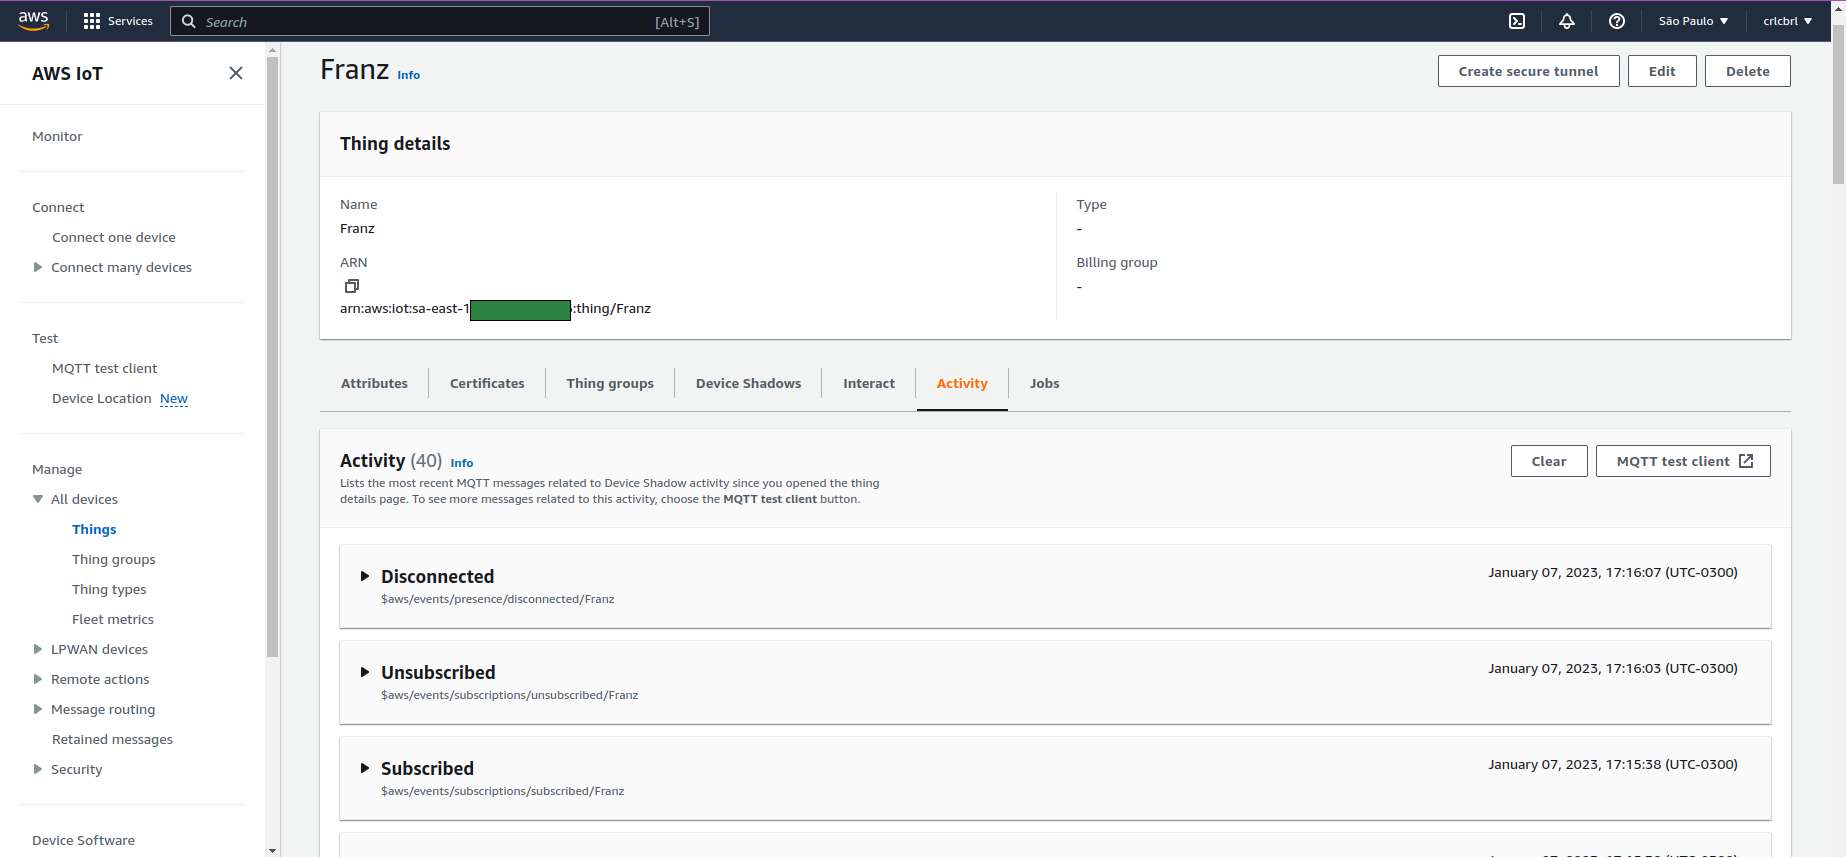
Part 3 - Monitoring the Franzininho
Now that the Franzininho is connected, we can monitor its activity from the AWS console.
- You can see the most recent messages at
Manage > Things > Your device name > Activity.
- You can also interact through the MQTT Test Client, for example, by publishing to the topic
CLIENT_IDENTIFIER "/example/topic"that we are subscribed to.
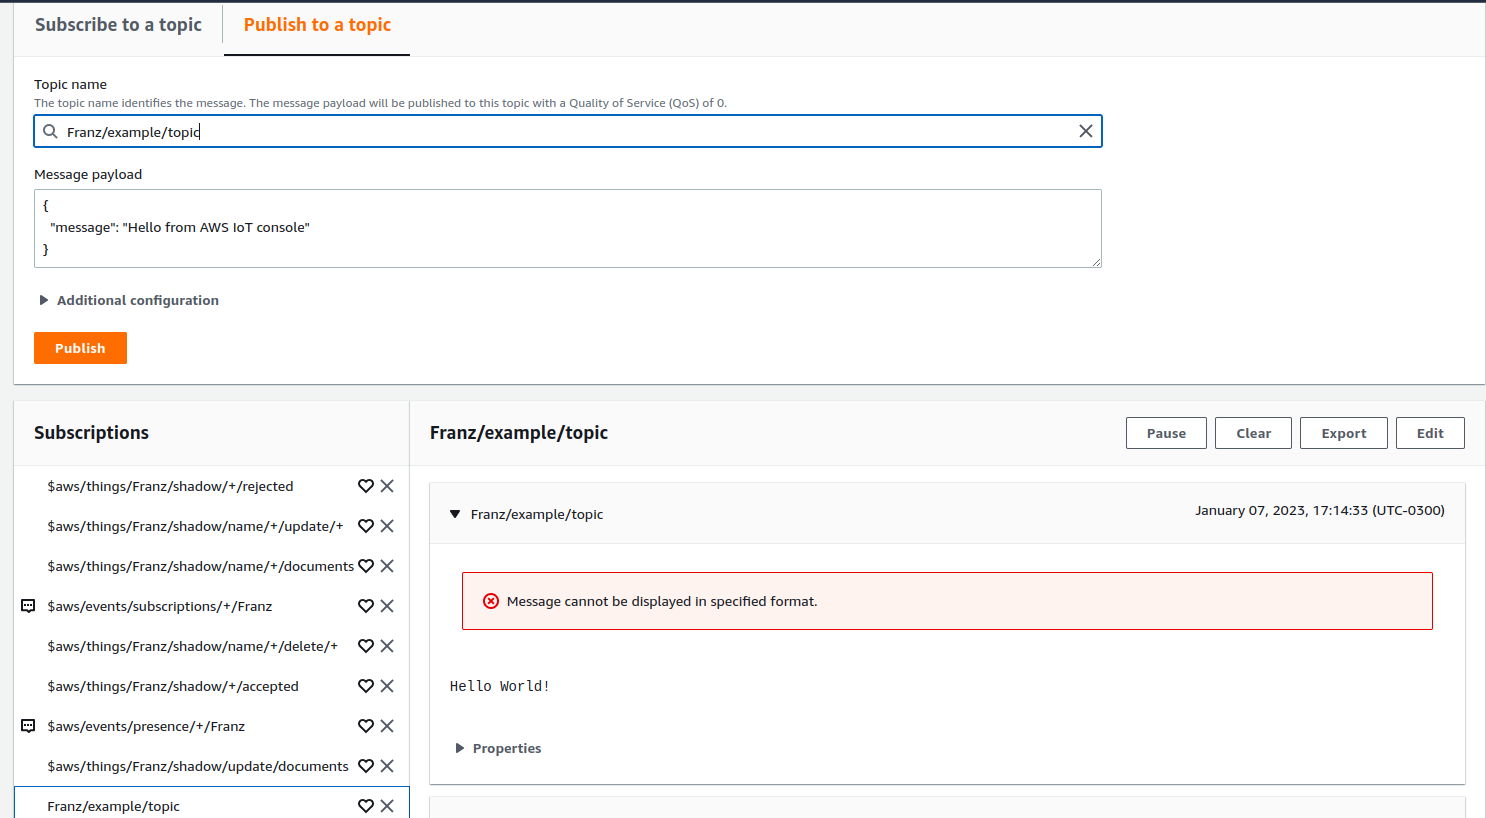
The received message can be seen on the Franzininho:
I (17668) coreMQTT: Packet received. ReceivedBytes=66.
I (17668) coreMQTT: De-serialized incoming PUBLISH packet: DeserializerResult=MQTTSuccess.
I (17668) coreMQTT: State record updated. New state=MQTTPublishDone.
I (17678) coreMQTT: Incoming QOS : 0.
I (17678) coreMQTT: Incoming Publish Topic Name: Franz/example/topic matches subscribed topic.
Incoming Publish message Packet Id is 0.
Incoming Publish Message : {
  "message": "Hello from AWS IoT console"
}.
And that's it — now you can play with the Internet of Things with your Franzininho WiFi using AWS!
| Author | Ana Carolina Cabral |
|---|---|
| Date: | 07/01/2023 |