Automated Sunflower
In this example we will make an automated sunflower that moves according to the position of light.
Materials:
- Franzininho DIY board
- Breadboard
- 3mm LED
- 1 LDR resistor (photoresistors 10k)
- 1 Servo motor
- Male/female jumper wires
Circuit
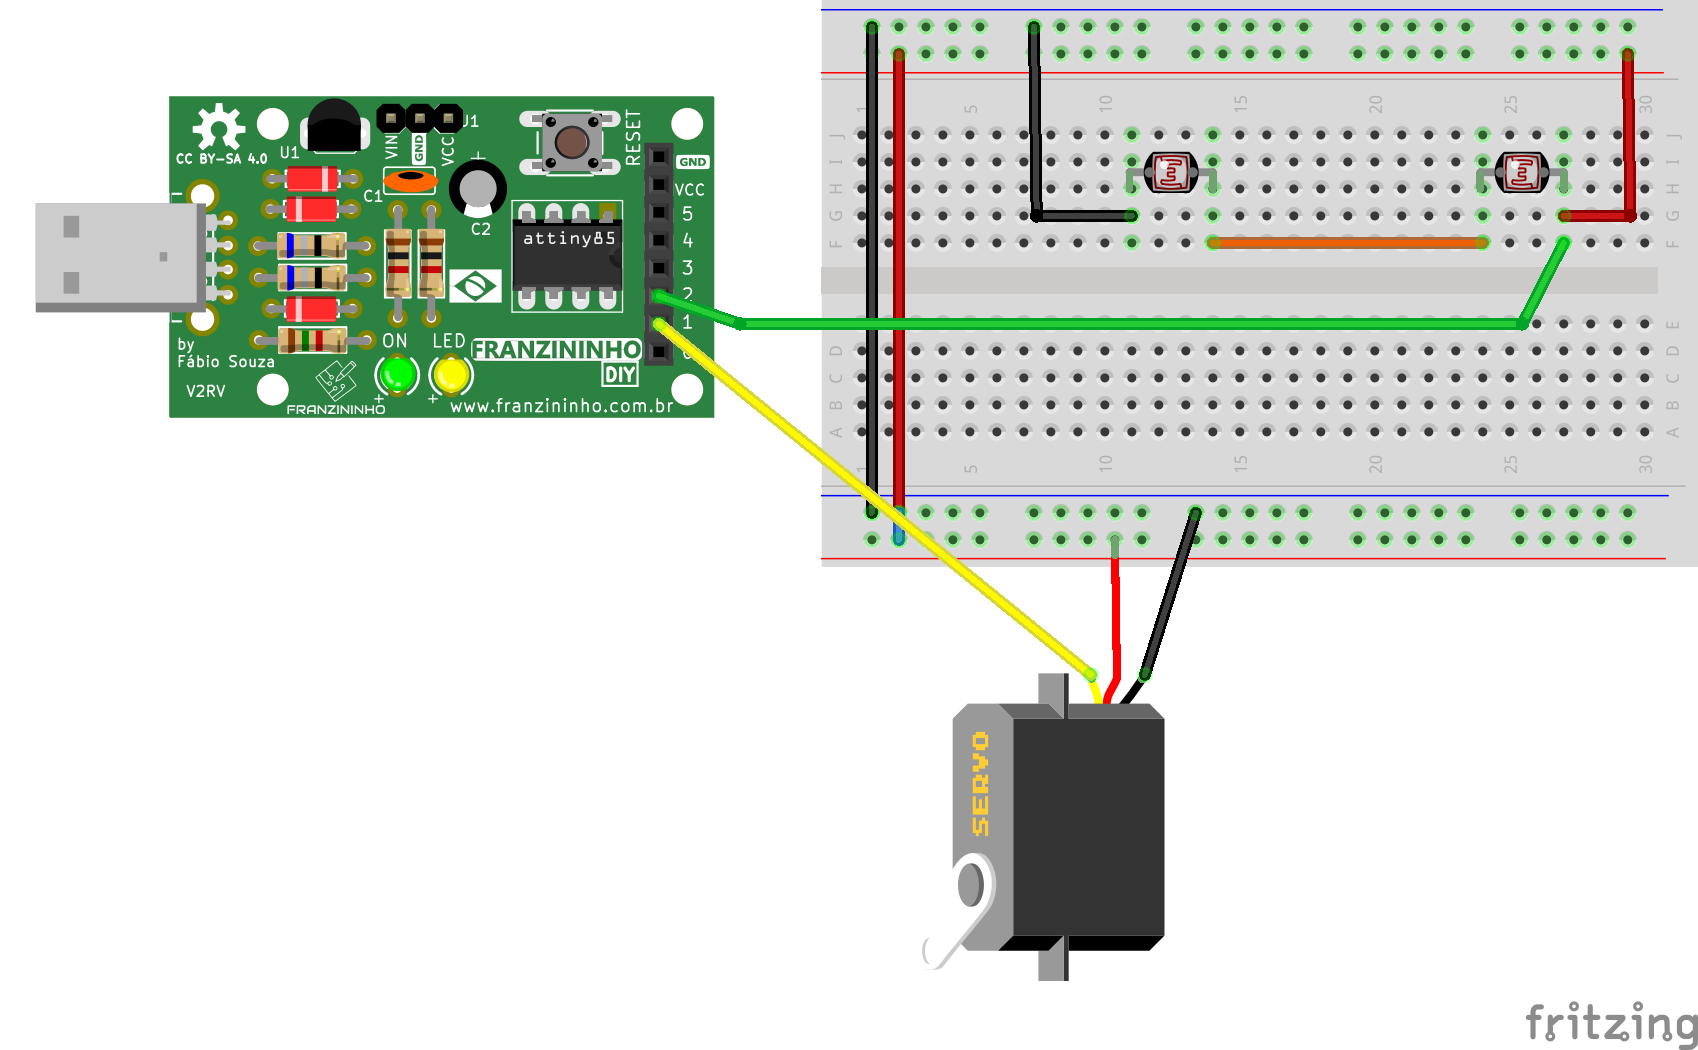
On the breadboard insert the photoresistors and servo motor as shown in the image below:
Code
/*
Franzininho
Example: Automated Sunflower
In this example we have an automated sunflower with two photoresistors, a servo motor, and other materials.
*/

#include <Servo.h>

int sensor = A;
int servoMotor = 1;

int sensorValue = 0;
int servoAngle = 90;

Servo servo;

void setup() {
  servo.attach(servoMotor);
  servo.write(servoAngle);
}

void loop() {
  sensorValue = analogRead(sensor);
  if (sensorValue < 512)
  {
    if (servoAngle < 170) servoAngle++;
  }
  if (sensorValue >= 512)
  {
    if (servoAngle > 10) servoAngle--;
  }

  servo.write(servoAngle);
  delay(50);
}
Explanatory Video
This project was made to collaborate in the Red Hat Co.Lab project. Check it out and other projects on the platform: https://www.redhat.com/pt-br/colab-repo
Co.Lab | Workshop: Educational Robotics - Learn about Natural Sciences and Electronics (Part 1)
Co.Lab | Workshop: Educational Robotics - Learn about Natural Sciences and Electronics (Part 2)
Reference
| Author | Diana Santos |
|---|---|
| Date: | 22/01/2022 |