LED Blink
The first thing you do when getting started with Arduino programming is the blink (which makes the LED blink at time intervals). The Franzininho is no different — you can test with the built-in LED or, if you prefer, connect an LED on a breadboard. Below we will explain how to make a blink with the Franzininho.
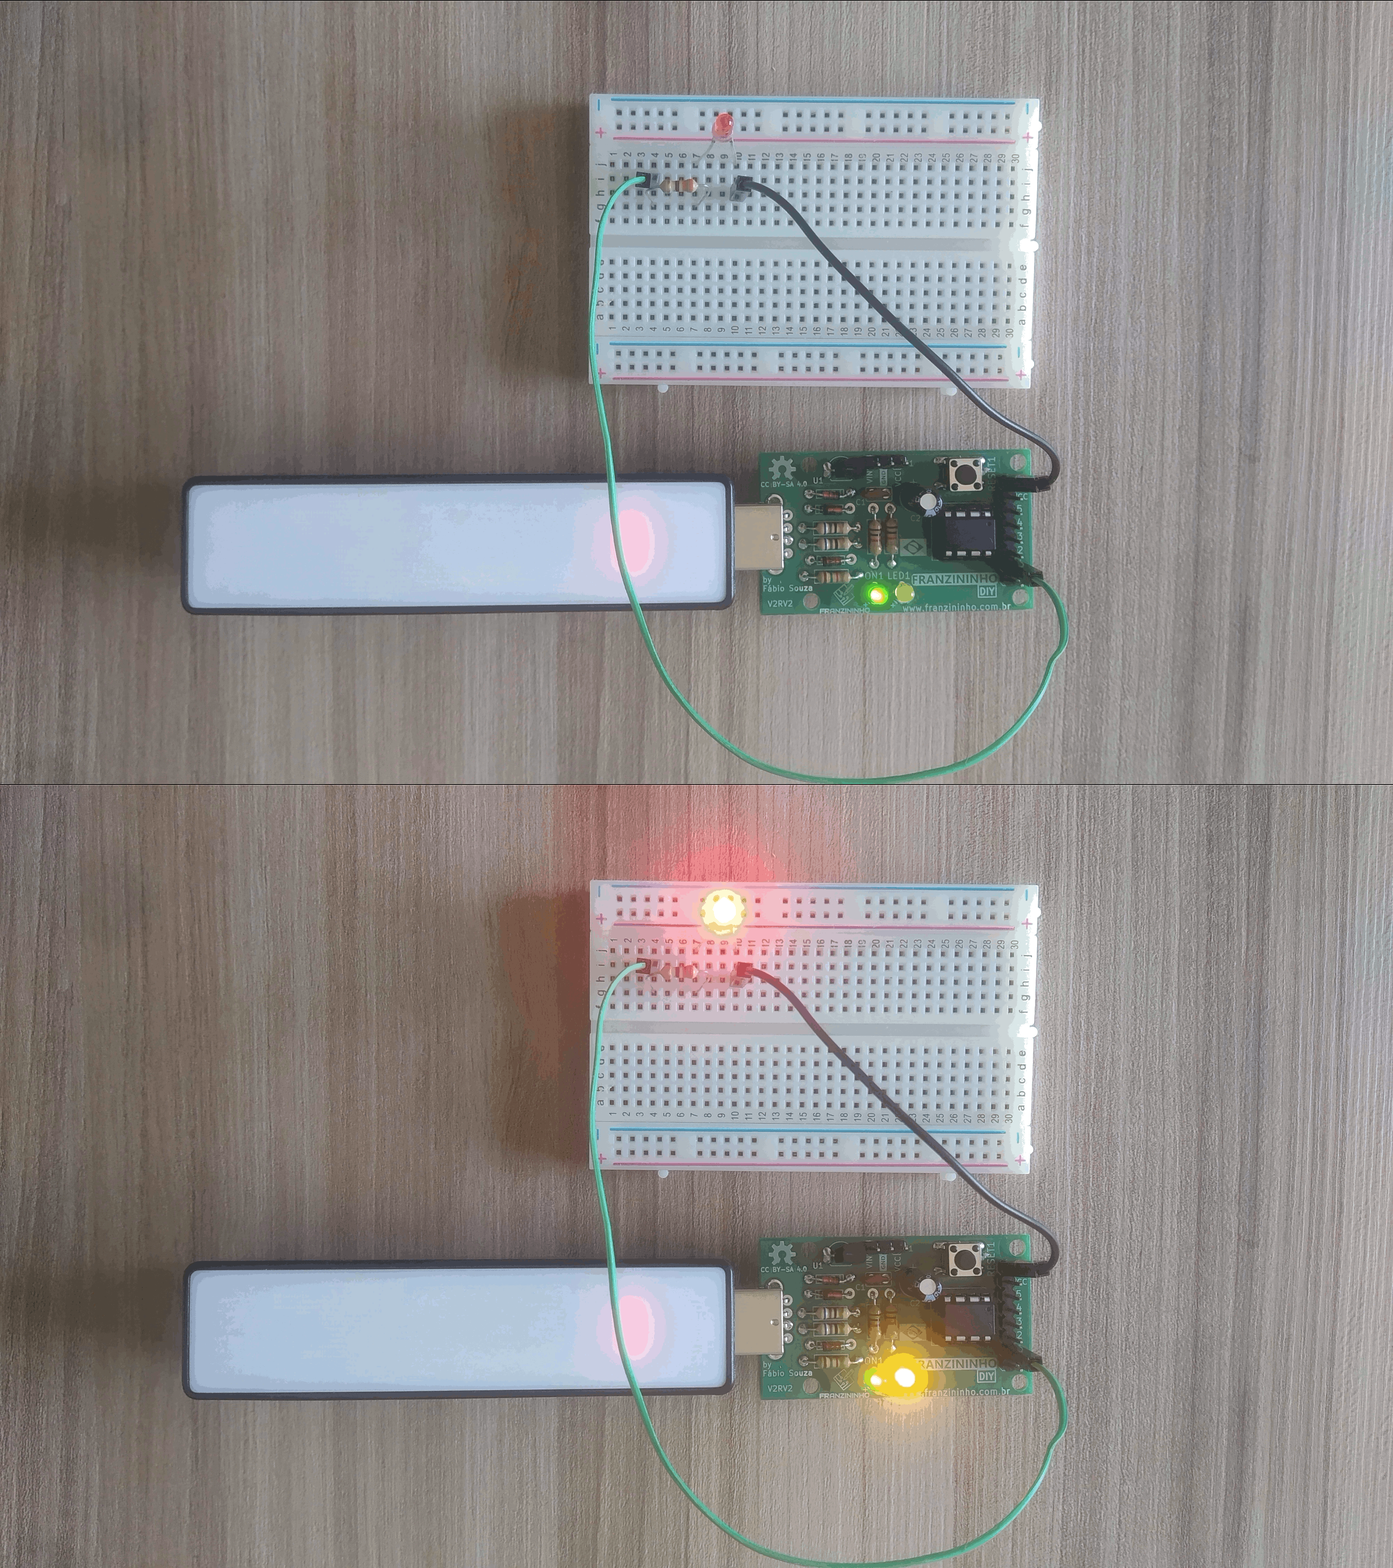
Materials:
- Franzininho board
- Breadboard
- 3mm LED
- 330 Ohm resistor
- Jumper wires
Circuit
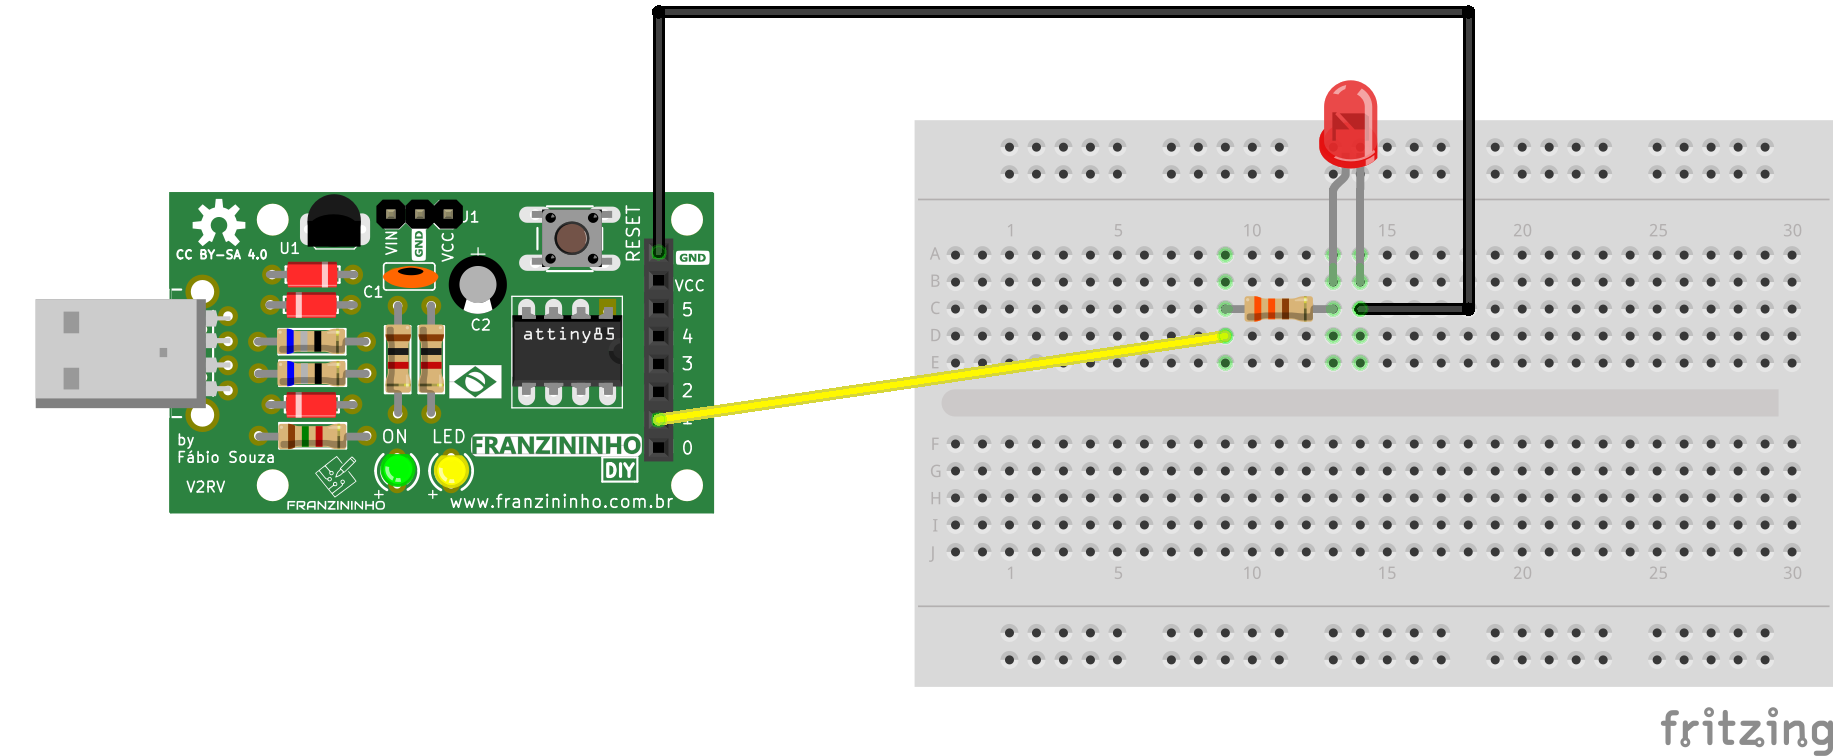
On the breadboard you can assemble the LED driving circuit as follows:
Sketch
/*
  LED Blink

  This example shows how to blink the LED on the board or an external LED
  connected to pin 1 of the Franzininho at 1-second intervals.
*/

const int LED = 1; // digital pin connected to the LED

void setup(){
  pinMode(LED, OUTPUT); // digital output pin
}

void loop(){
  digitalWrite(LED, HIGH);  // turn on the LED
  delay(1000);              // wait one second
  digitalWrite(LED, LOW);   // turn off the LED
  delay(1000);              // wait one second
}