Arduino IDE Configuration
For programming the Franzininho DIY we recommend using the ATtinyCore package, maintained by Spence Konde, available here.
Soon we will have a Franzininho package that will simplify the IDE configuration process. Stay tuned for updates.
Arduino IDE Configuration
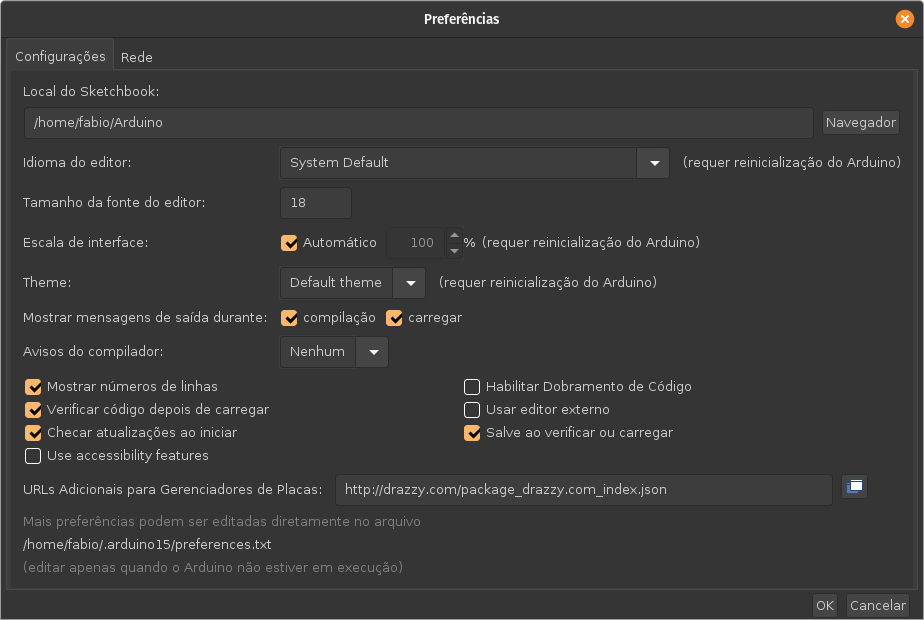
After installing the Arduino IDE (download here), go to File -> Preferences and paste the following URL in Additional Board Manager URLs:
http://drazzy.com/package_drazzy.com_index.json
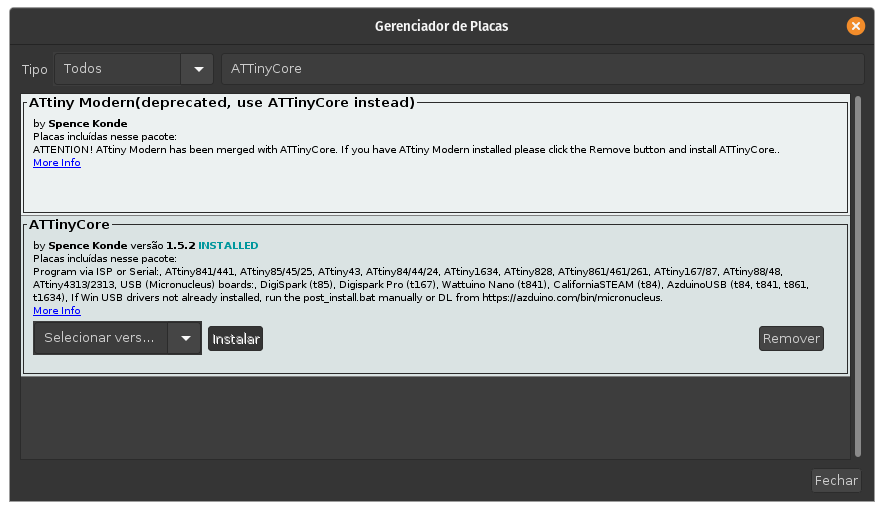
Now open the Board Manager: go to Tools -> Board -> Board Manager and search for ATTinyCore. After finding the package, click Install and wait for the installation:
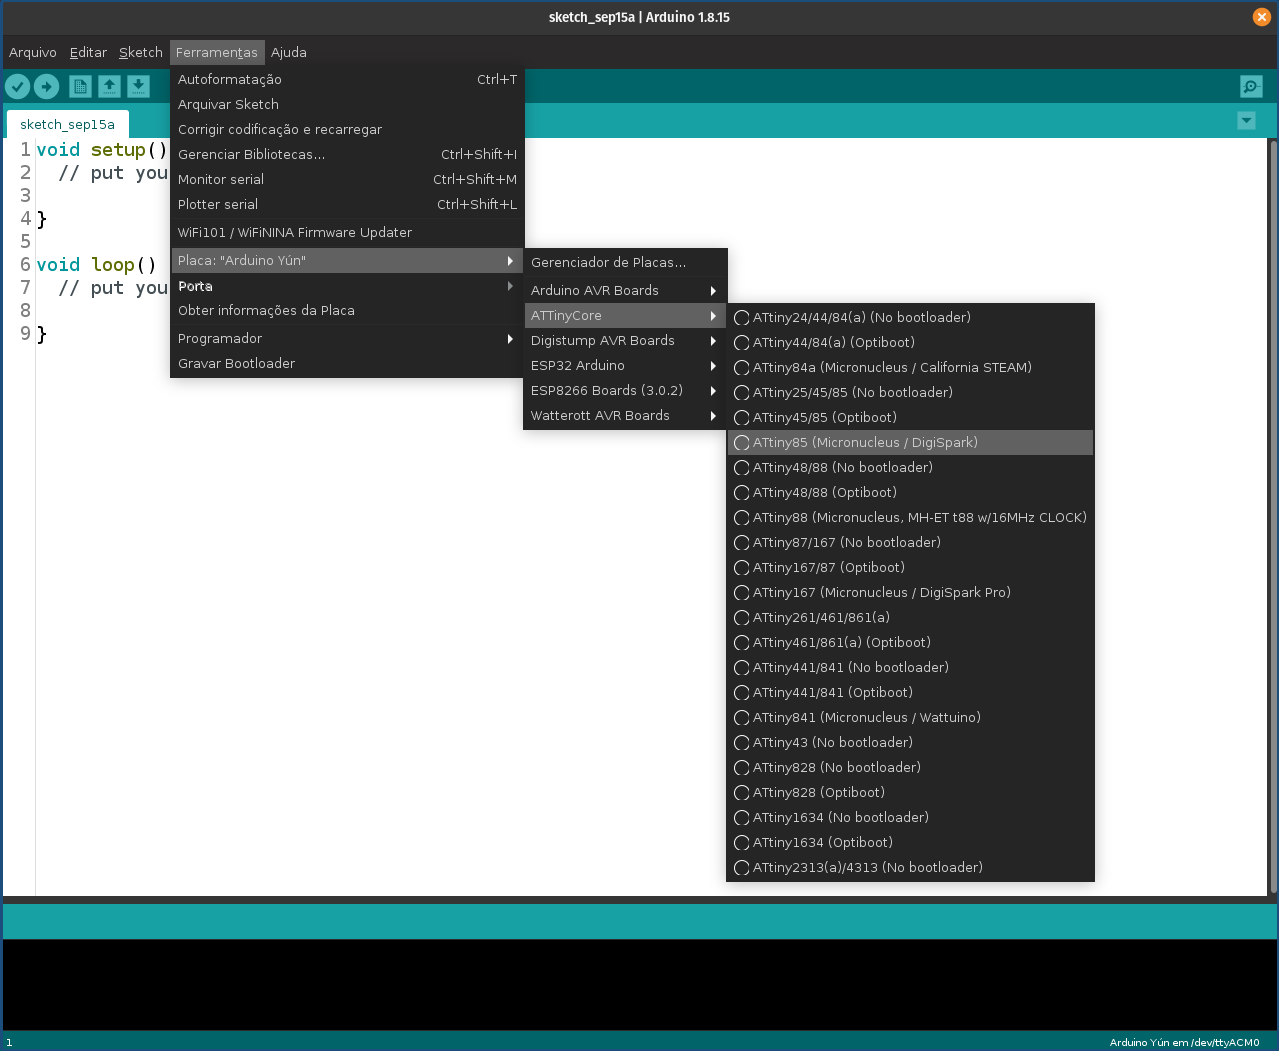
Done. Now let's configure the board. Select the ATTiny85 (Micronucleus/Digispark) board:
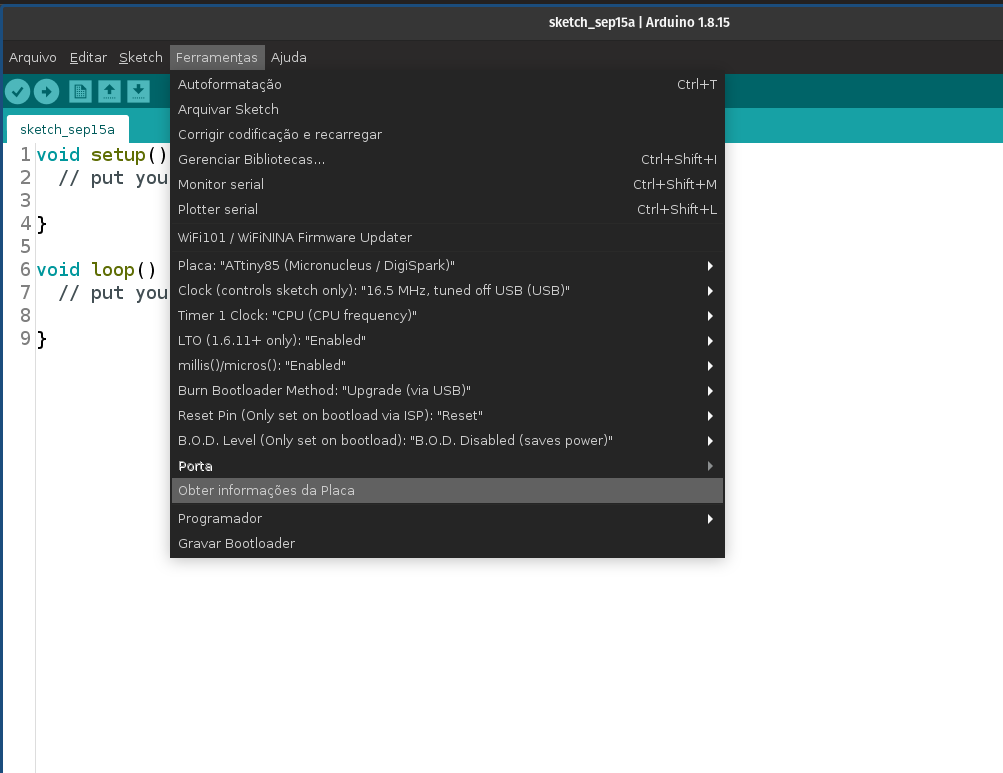
The remaining settings should be as follows:
Now let's load a sketch to verify everything is working and understand the upload process for the board.
Code Upload
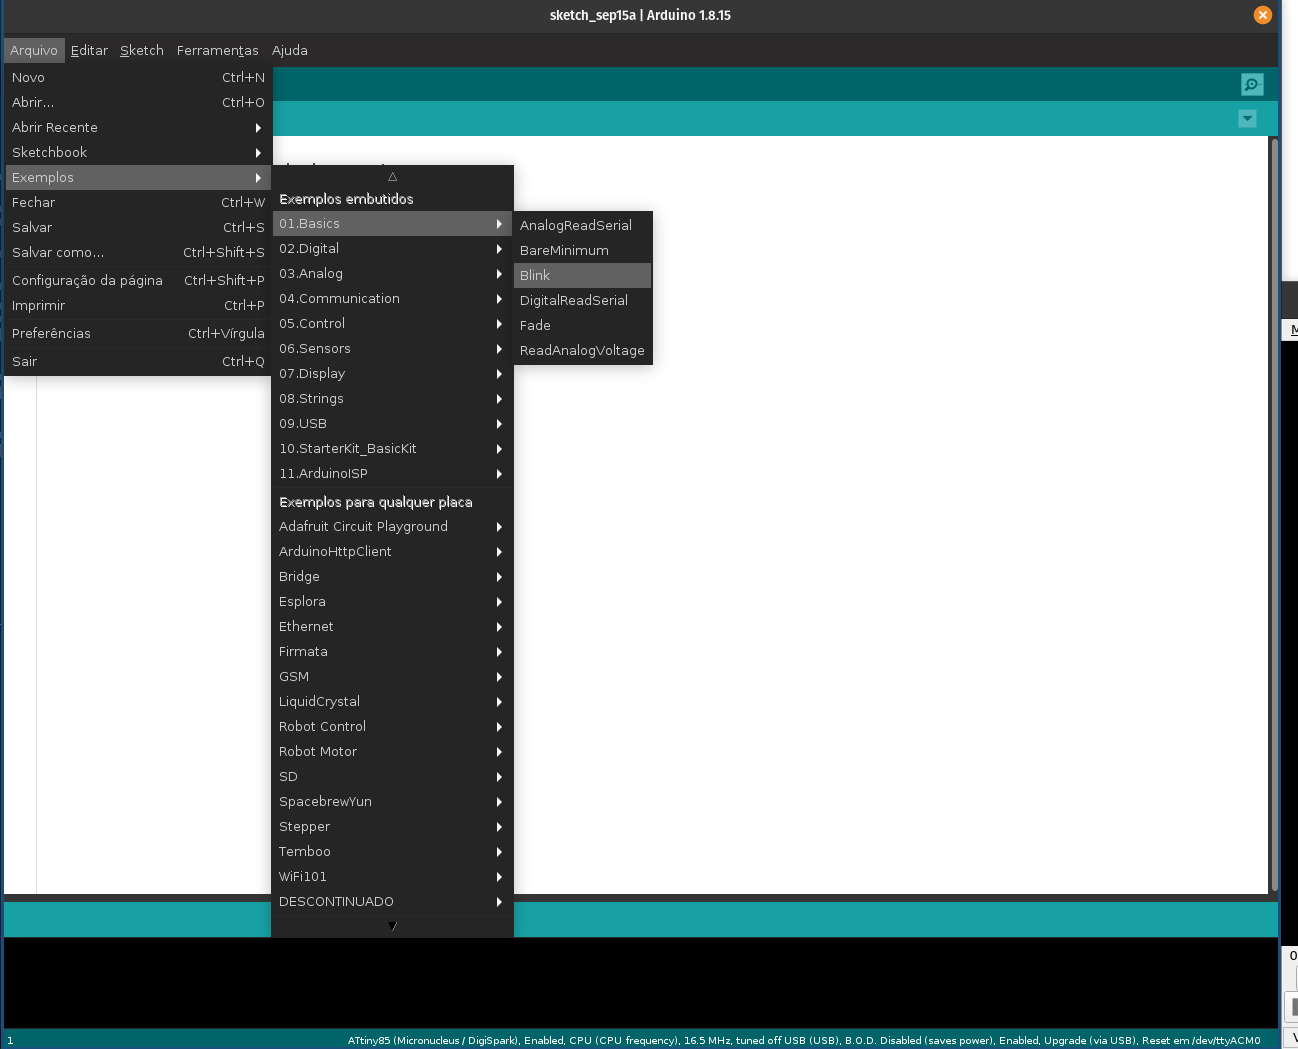
Open the Blink example. Go to File -> Examples -> 01.Basics -> Blink:
Now let's load the sketch to the board. Click the Upload button:

After compilation, the following message will be displayed:
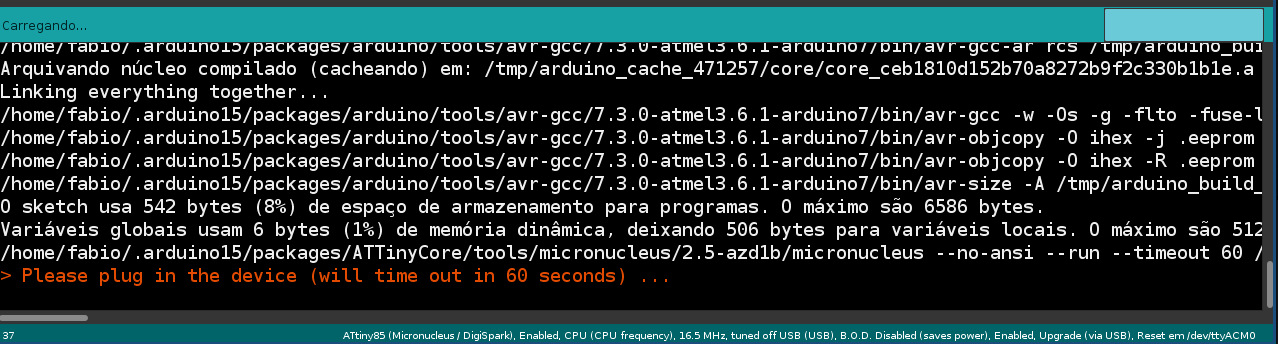
Connect the board to the USB port. If the board is already connected, press the reset button when you see this message. The code will be loaded to the board:
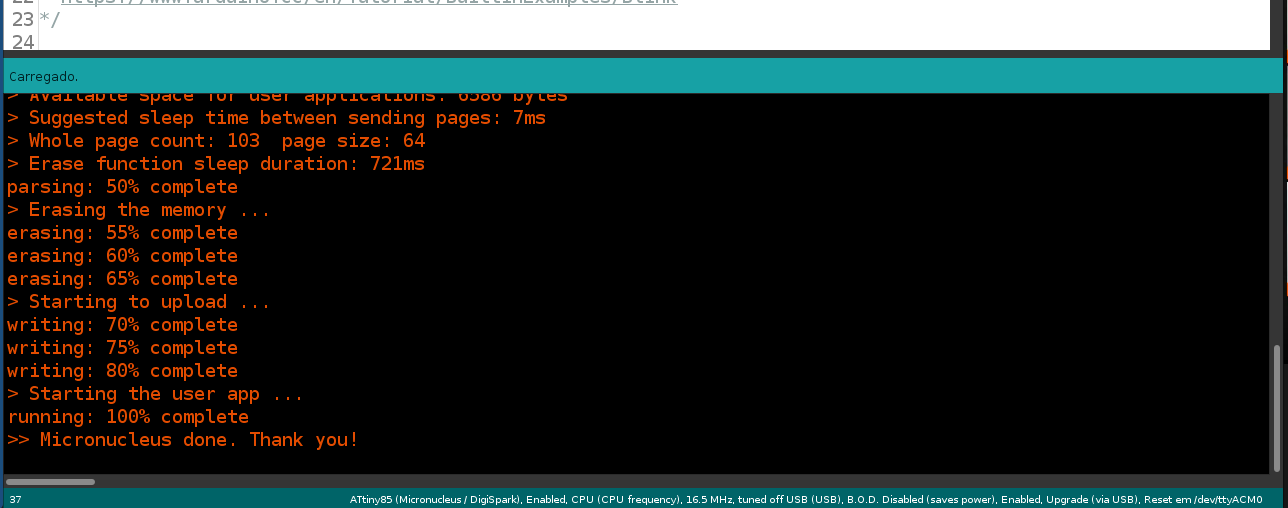
After the upload, the yellow LED on the board will start blinking.
If you got here without any issues, congratulations! You can now test the examples in the documentation or build your own projects.
If you have any problems, check whether you can solve them with the solutions below.
Troubleshooting Configuration and Upload Issues
Coming soon