On/Off Button
In this example we will make an on/off button that can be used for various switching purposes.
Materials
- Franzininho board
- Breadboard
- 3mm LED
- 1 330 Ohm resistor
- 1 1K resistor
- 1 Button
- Jumper wires
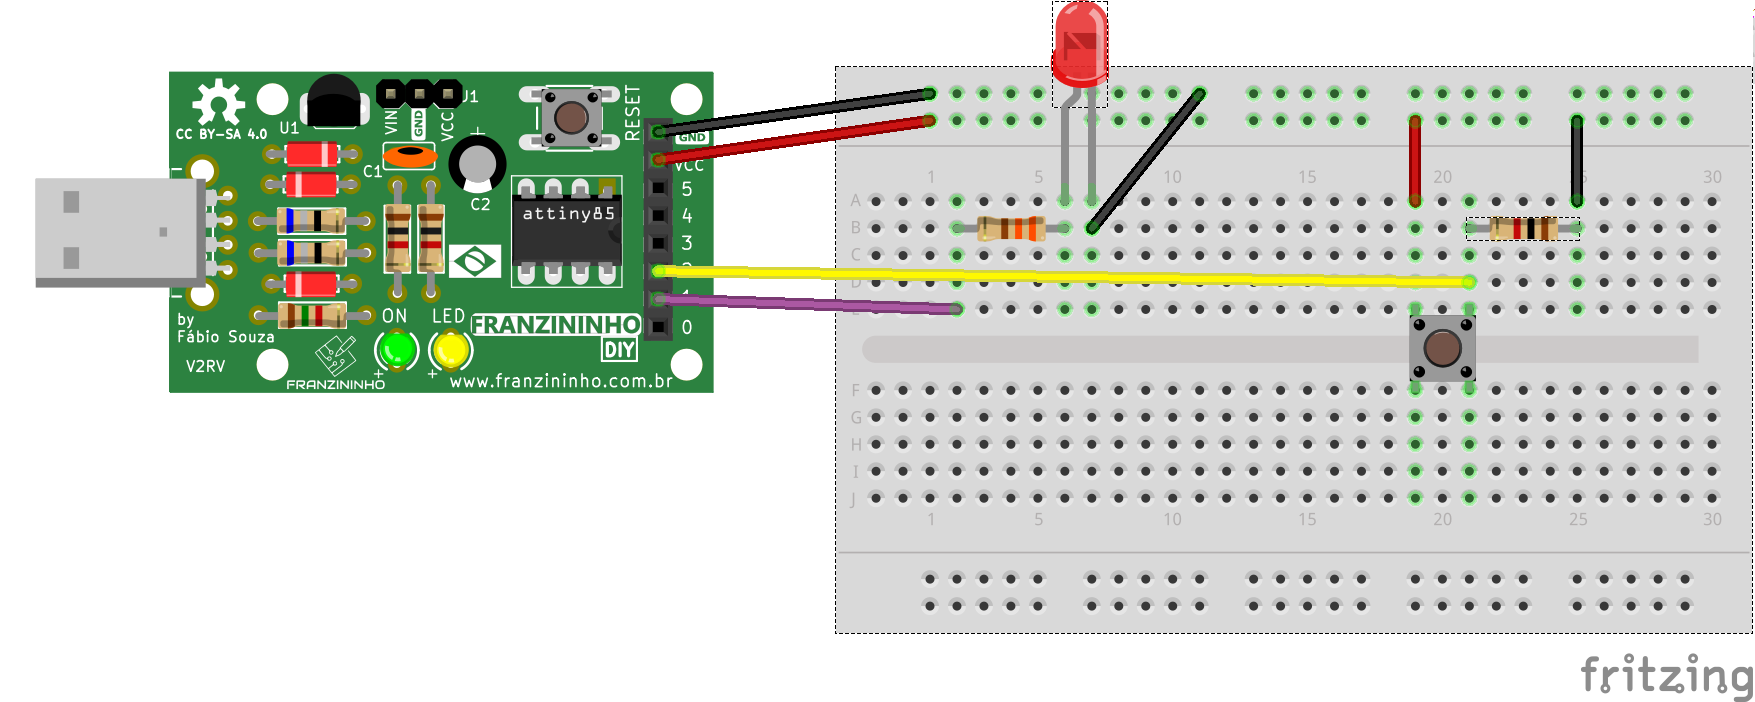
Circuit
On the breadboard insert the LED, resistors, and button as shown in the image below:
Sketch
/*
  Franzininho
  Example: On/Off Button
  This example shows how to toggle an output on and off using a button
*/
const int LED = 1;    // pin for the LED
const int BUTTON = 2; // pin for the button
int previousButtonState = 0; // stores the previous button state

void setup(){
  pinMode(LED, OUTPUT);    // the LED is an output
  pinMode(BUTTON, INPUT);  // the BUTTON is an input
}

void loop(){
  int currentBTState = digitalRead(BUTTON); // Read button state
  delay(10);

  if ((currentBTState != previousButtonState) && (currentBTState == LOW)) { // If button was pressed and state changed
    digitalWrite(LED, !digitalRead(LED)); // toggle LED state
  }
  previousButtonState = currentBTState; // save button state for comparison in next reading
}