Installing the Tools
CircuitPython does not require specific programming tools. A simple text editor is sufficient. However, to make coding easier and more productive, we can use some tools.
We recommend the following tools for working with CircuitPython:
In this tutorial we will focus on the Mu Editor for its simplicity and ease of use. Below we show the installation process for Windows and Linux operating systems.
Windows
Installing the Mu Editor
To install the Mu Editor on Windows, follow these steps:
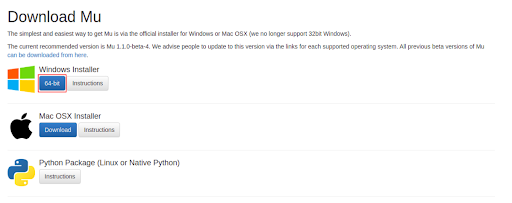
Step 1: Go to https://codewith.mu/ and click Download:

Step 2: Click the Windows Installer option.
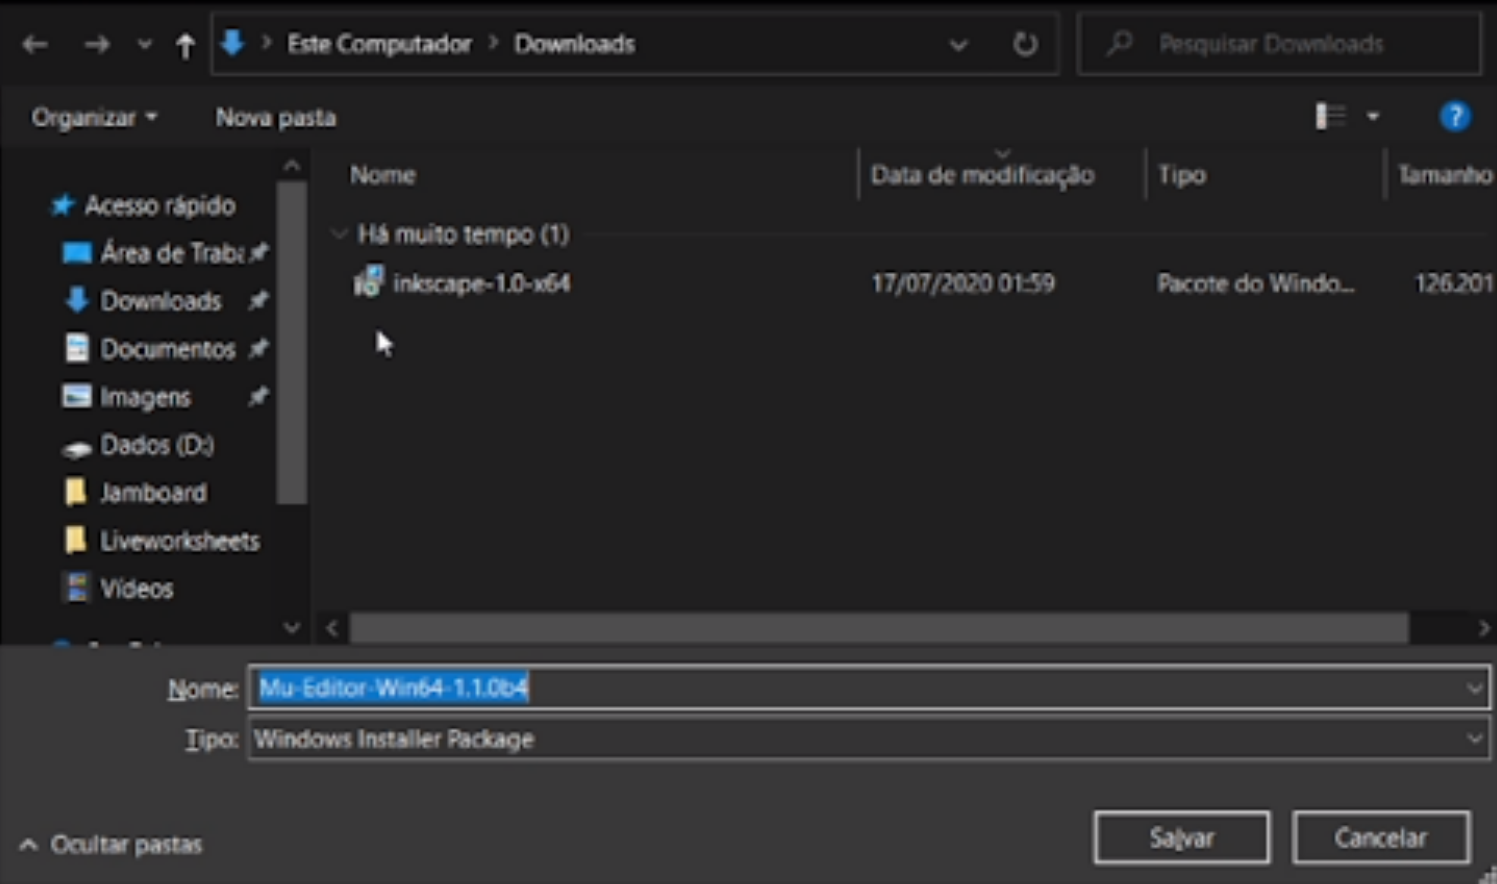
Step 3: Save it to your computer.
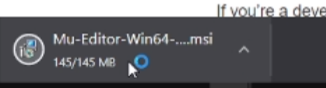
Step 4: Wait for the download to finish and then click to open the file you just downloaded.
Step 5: After downloading the program, double-click it. A screen will appear where you need to accept the software terms of use. Check the box and press Install, then wait for the installation to complete.
Step 8: Search on your computer for: Mu Editor
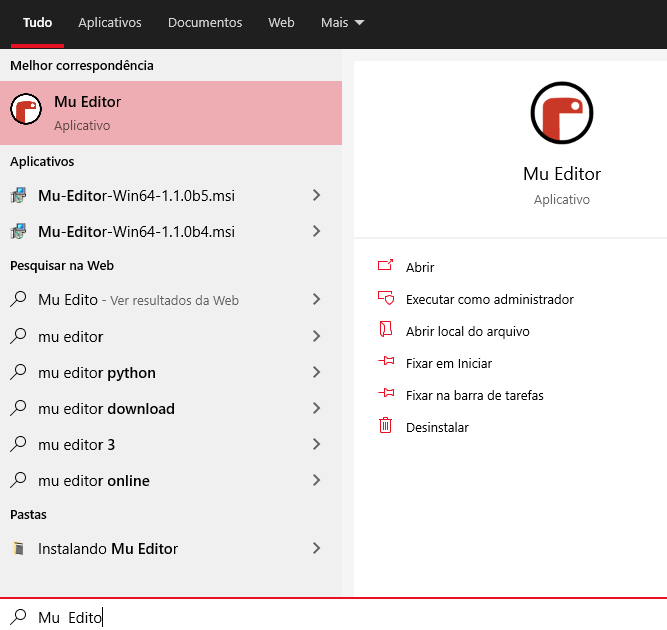
Step 9: When you open the program, wait — this is the Mu Editor start screen.

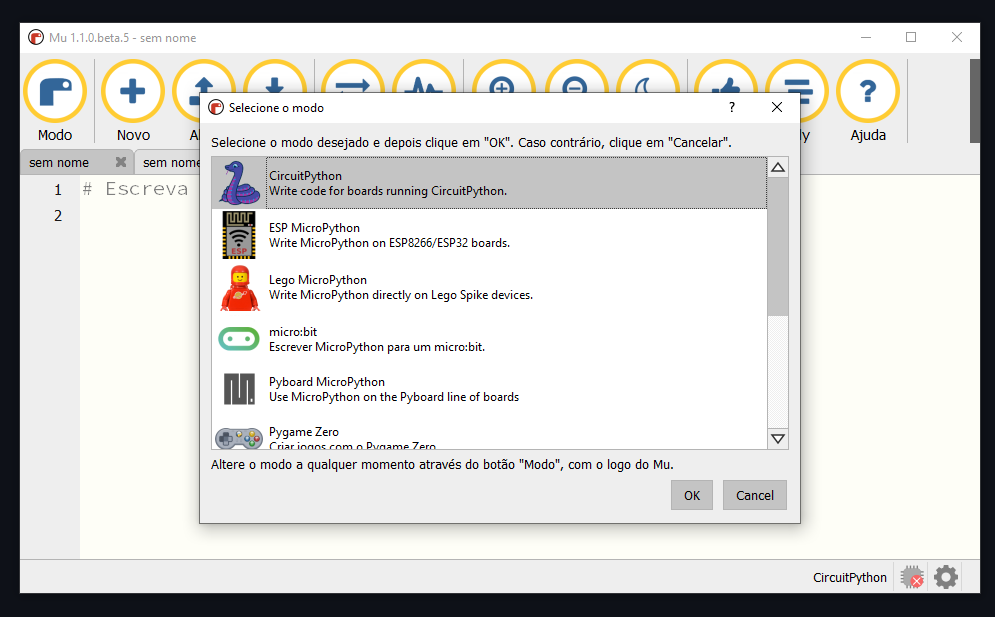
Step 10: Then choose CircuitPython as shown in the image below. If it does not open automatically, click "Mode".
Step 11: Done, now just have fun!
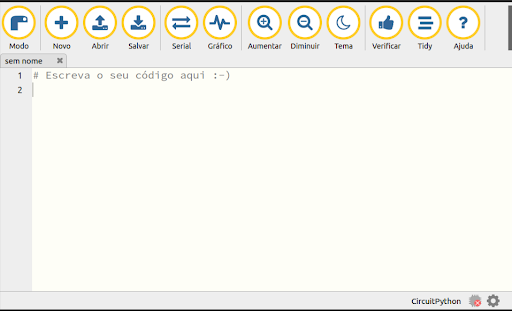
Step 12: Open the code.py file and start having fun with the Hello, World! presented in the next section.
Serial terminal installation for REPL access (Optional)
Below we will present the serial terminal installation for REPL access through serial communication.
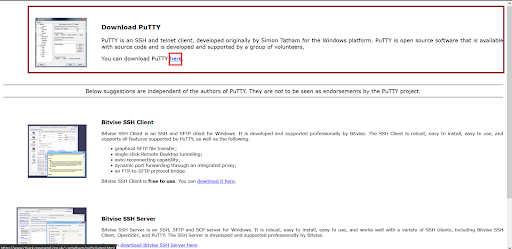
We will install the PuTTY serial terminal for our examples. Download it at: https://www.putty.org/
On the site, click the first option.
Check your system. In my case it is 64-bit, so I will click on the 64-bit x86 option. Then just save.
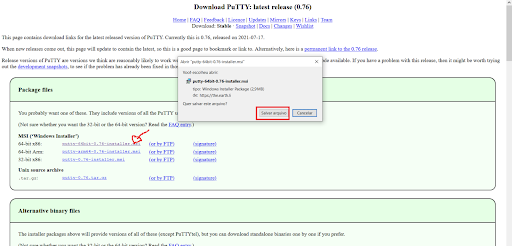
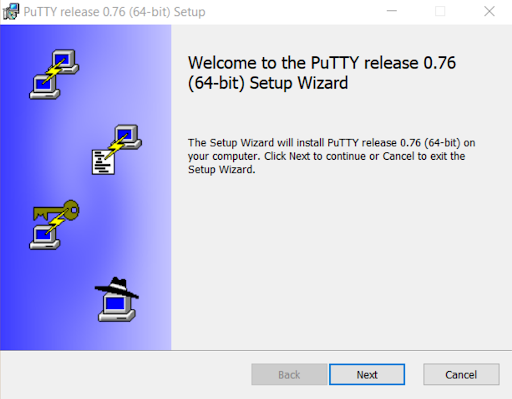
After downloading, double-click the file. A window will open as shown below. Click Next and then Install:
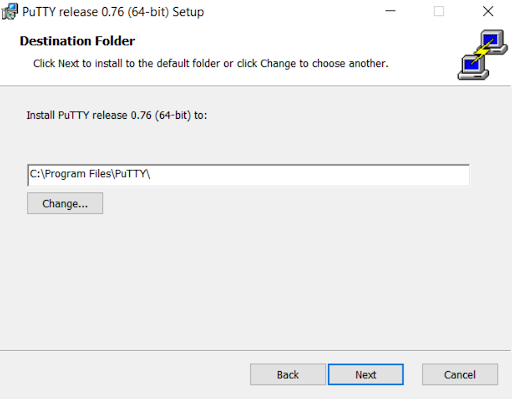
Click Install again:
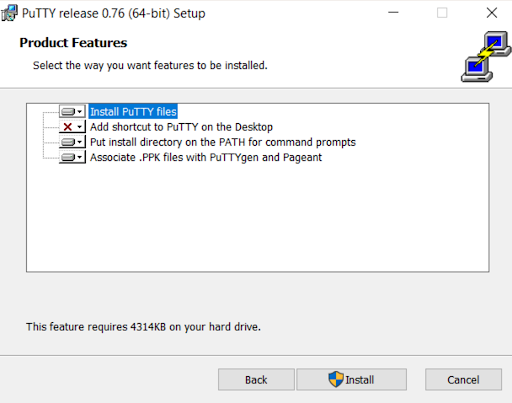
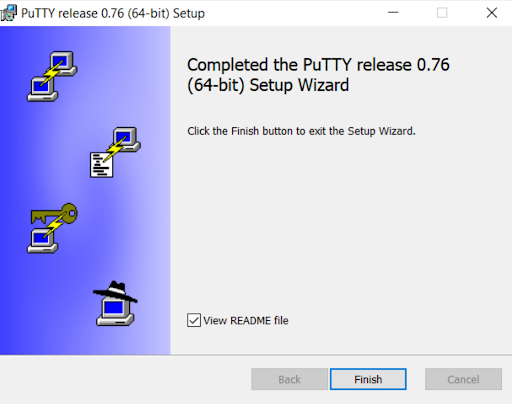
Wait and click Finish:
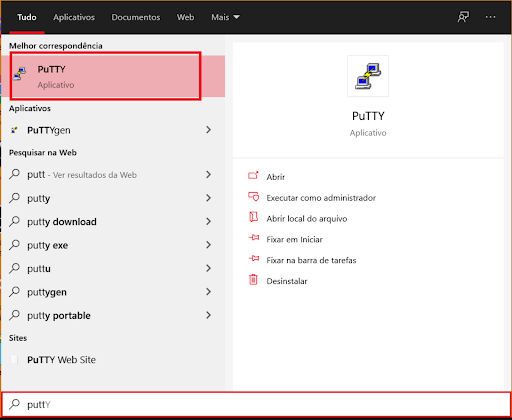
We have finished the configuration step. The next step is to open the PuTTY program on your computer. Below I will explain the first steps with it.
As mentioned above, open PuTTY:
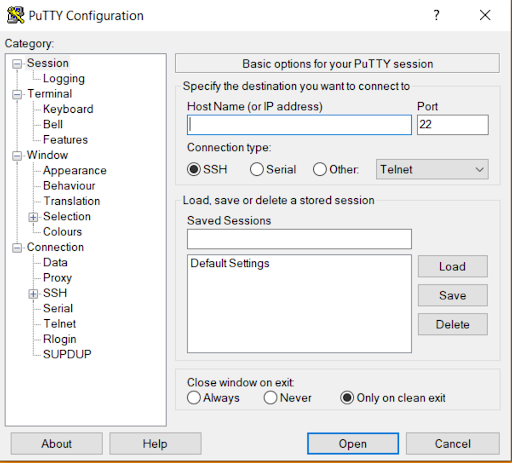
A window like the image above will open. Meanwhile, let's go to the Device Manager.
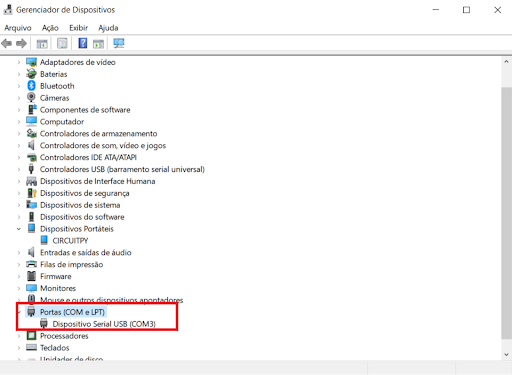
Go to Ports (COM and LPT). Here you will find which port the board is connected to. Click to expand and you will see USB Serial Device (COM3).
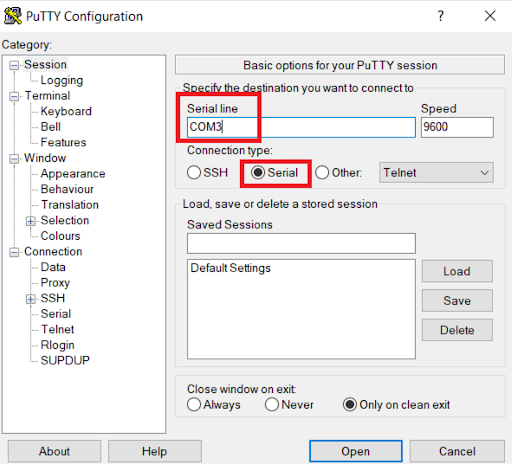
Now we will make some changes as shown in the image below: change COM 1 to COM3, select the Serial option, and click Open.
A screen similar to a terminal will appear. Press Ctrl + C to enter the Python interpreter on the board:

Now that the board is connected, we can send commands for it to execute through the REPL.
Type print("Hello, World!") and press Enter.

We executed the print command above. You can test other messages by changing the text inside the quotes.
We can also perform mathematical operations.

We can also access CircuitPython functions for hardware access. Let's see which pins the Franzininho WiFi has available?
Type import board, press Enter. Type dir(board) and press Enter.
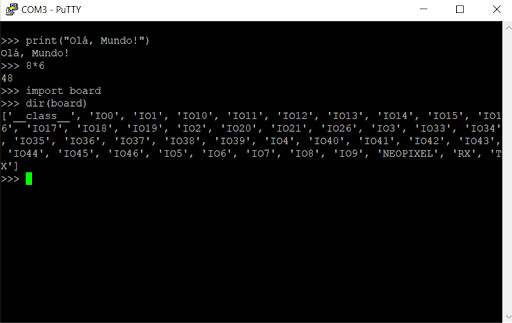
These are the pins we will work with for our applications.
This was just a quick experience for REPL access. This tool will help us test code or devices quickly.
For editing larger code and projects that you need to save, we recommend editing the code.py file.
To access this file, open the storage device (CIRCUITPY).
Linux
Installing the Mu Editor
To install the Mu Editor on Linux, follow these steps:
Step 1: Go to https://codewith.mu/ and click Download:
Step 2: Click the Python Package (Linux or Native Python) option.

Step 3: Open your terminal and type the command below; it will install Python libraries — wait until it finishes:
pip3 install mu-editor==1.1.0b5
Step 4: Now type this command:
mu-editor
Step 5: Done, now just have fun!
Step 6: Open the code.py file and start having fun with the Hello, World! presented in the next section.
Serial terminal installation for REPL access (Optional)
Below we will present the serial terminal installation for REPL access through serial communication.
Install a terminal. For example, to install picocom, type the commands below:
sudo apt-get update
sudo apt-get install picocom
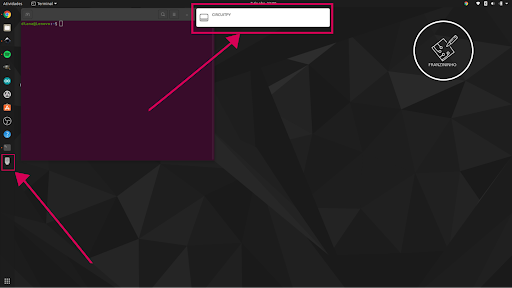
To access the Franzininho WiFi through the REPL using the serial terminal on Linux, the first step is to connect the Franzininho WiFi board to your computer. Something similar to a USB drive device will appear, as shown in the image below:
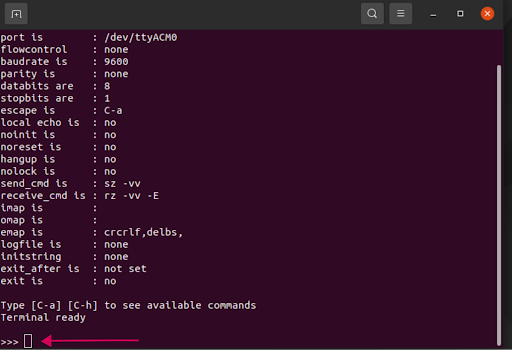
Now we will open the Serial terminal to the serial port where the board is connected. Open the command terminal and type: picocom /dev/ttyACM0 and press Enter.
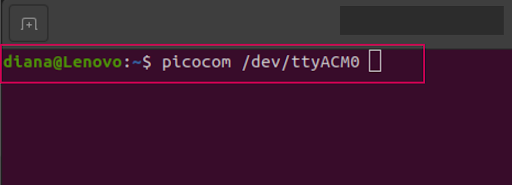
Now press Ctrl+C on the keyboard and >>> will appear.

Done — we are on the Franzininho WiFi board and can send commands directly to it.
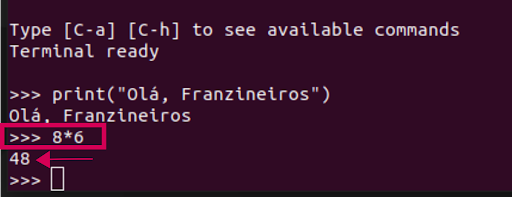
Type: print("Hello World") and press Enter (you can write anything inside the quotes and it will display what you wrote):
Notice that we are executing Python commands through the REPL.
Now let's perform a mathematical operation: type a number, choose a mathematical operation, type another value, press Enter, and observe the result:
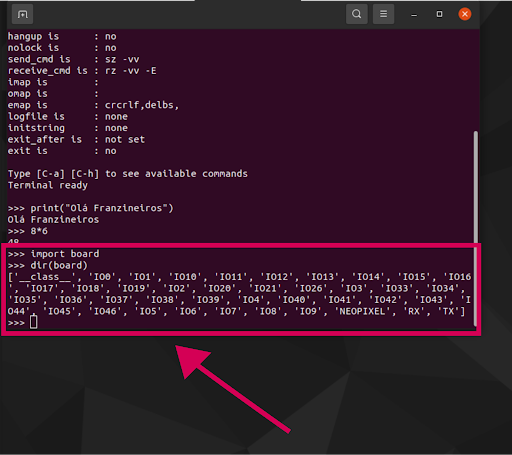
Now type the following code in the terminal:
import board
dir(board)
The set of pins available on the Franzininho WiFi will appear.
This was just a quick experience for REPL access. This tool will help us test code or devices quickly.
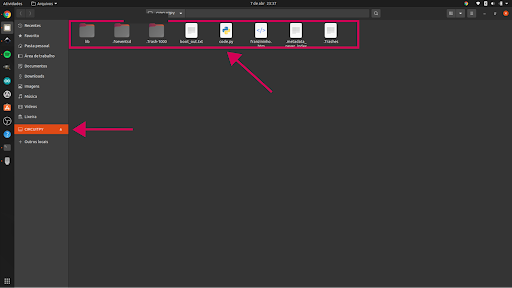
For editing larger code and projects that you need to save, we recommend editing the code.py file.
To access this file, open the storage device (CIRCUITPY):
Now let's see what is possible to do with CircuitPython. Let's go!
Alternative Tools
Franzininho WiFi: Configuring Thonny IDE to work with CircuitPython
| Author | Diana Santos |
|---|---|
| Author | Fábio Souza |
| Date: | 16/09/2021 |