Serial Console
In this example we will use the serial console to control the color of the Franzininho WiFi LED with CircuitPython.
Required Materials
- 1 Franzininho WiFi board with CircuitPython
Circuit
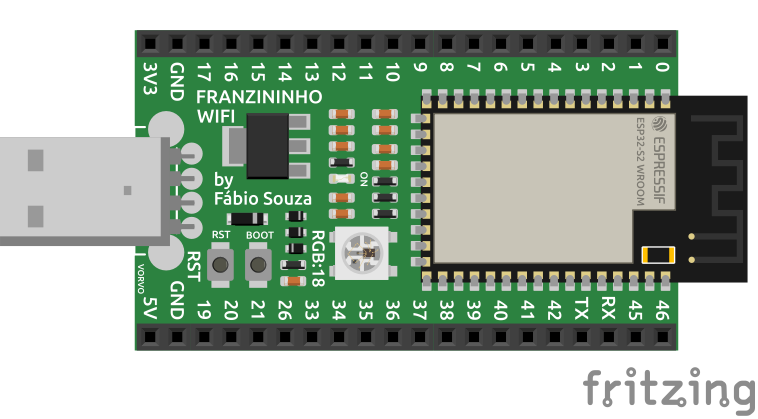
No extra components are needed for this example, only the Franzininho WiFi board:
Note: In this example we will use the Mu Editor, but any editor with serial communication support can be used.
Code
Type the code below in the code.py file located in the CIRCUITPY directory and save the file:
You will probably find another code in the code.py file. Delete it and insert the new code.
# code.py

""" RGB LED color control through the serial console """
import board
import digitalio
import neopixel_write

pin = digitalio.DigitalInOut(board.NEOPIXEL)
pin.direction = digitalio.Direction.OUTPUT

while True:
    print("Enter the intensity of the red color:")
    r = int(input())
    print("Enter the intensity of the green color:")
    g = int(input())
    print("Enter the intensity of the blue color:")
    b = int(input())
    color = bytearray([r, g, b])
    neopixel_write.neopixel_write(pin, color)
    print("Color: {} {} {}".format(r,g,b) )
    print("[ENTER] - to change the color.")
    input()
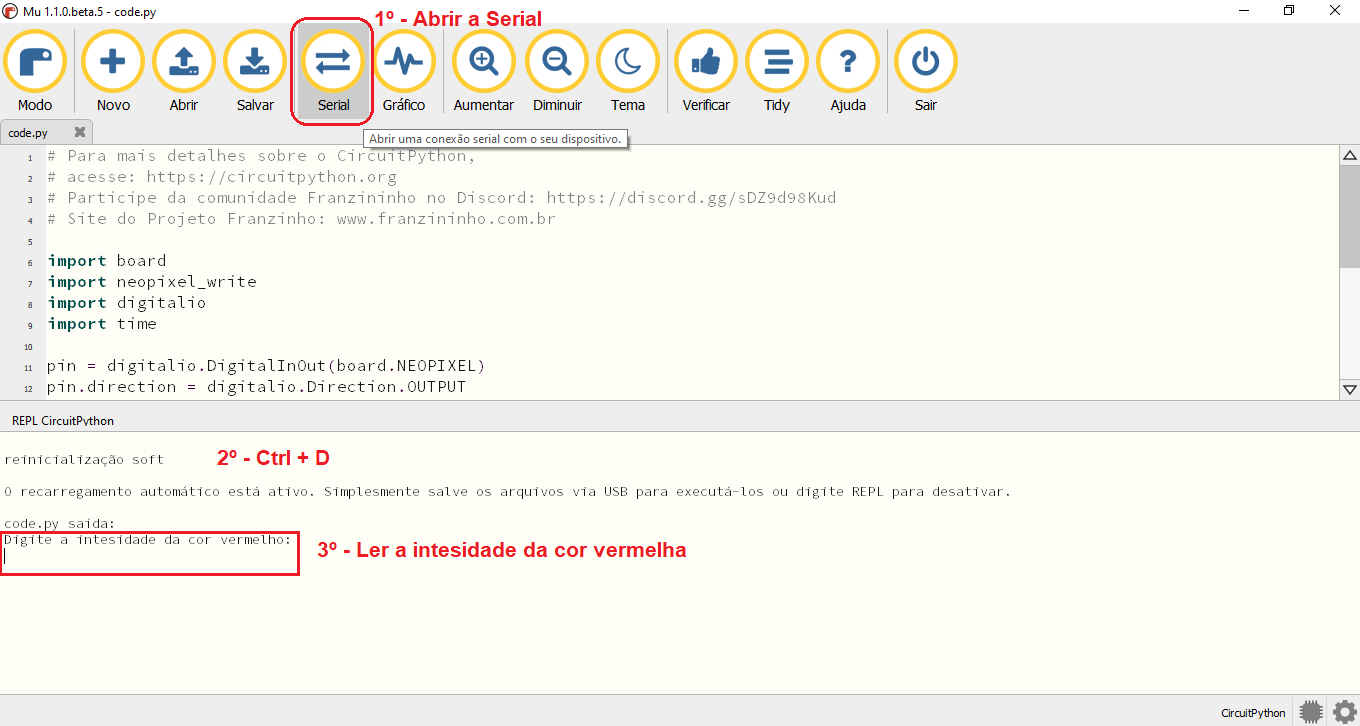
After finishing editing the file, save it. After saving the file, open the Mu Editor serial console.
Code Analysis
To access the board pins we need to import the board module:
import board
We will use the NeoPixel LED built into the Franzininho WiFi board itself. This LED is connected to GPIO 18 of the ESP32-S2 of the Franzininho WiFi.
![]()
Since the LED is an actuator, we need to configure the pin as a digital output. For this, we need to import the module:
import digitalio
The NeoPixel RGB LED uses a specific communication protocol since inside the LED there is an integrated control chip that controls the three LEDs within the package. To simplify the implementation of our program, we chose to use a library available within CircuitPython itself — neopixel_write:
import neopixel_write
With all modules imported, we can access the digital pin configuration functions:
pin = digitalio.DigitalInOut(board.NEOPIXEL)
pin.direction = digitalio.Direction.OUTPUT
Note that we first map the pin and then configure the direction.
Unlike other frameworks such as Arduino, ESP-IDF, and most frameworks written in C/C++, the Python interpreter already enables UART for serial communication by default, eliminating the serial initialization that would be required in Arduino, for example.
Code snippet needed to configure serial communication in Arduino:
Serial.begin(115200);
You will never forget to enable serial before trying to print again. 😉
In this example, two functions are important to highlight. These are the functions that allow writing and reading data from the console.
The "print" function to print a message to the serial console:
print("Something to be printed on serial")
And the "input" function to read values from the serial console:
a_variable = input()
Now let's create our main loop:
while True:
    print('Enter the intensity of the red color:')
    r = int(input())
    print('Enter the intensity of the green color:')
    g = int(input())
    print('Enter the intensity of the blue color:')
    b = int(input())
    color = bytearray([r, g, b])
    neopixel_write.neopixel_write(pin, color)
    print('Color: {} {} {}'.format(r,g,b) )
    print('[ENTER] - to change the color.')
    input()
In the main loop we will use the print/input functions to read the color values for the three LEDs.
We build a bytearray and call the neopixel_write function to update the NeoPixel LED color.
color = bytearray([r, g, b])
The neopixel_write function only needs two parameters: the pin where the LED is connected and a bytearray containing one byte for each LED color.
neopixel_write.neopixel_write(pin, color)
The bytearray follows this format: the first byte represents the red LED intensity, the second byte represents the green LED intensity, and the third byte represents the blue LED intensity.
Execution
To open the serial console in Mu Editor, click the "Serial" button and then press "Ctrl + D" to restart the script execution on the board. Soon after, you will see the first message from the script, requesting the value of the first color — red — in the console.
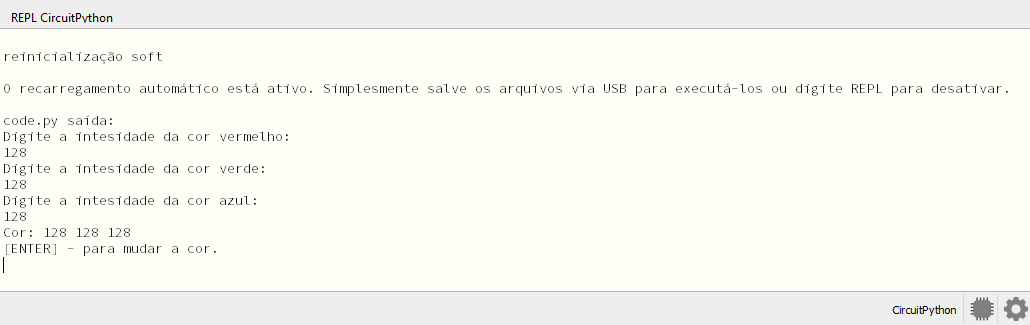
Here is an example of execution in the Mu Editor serial console.
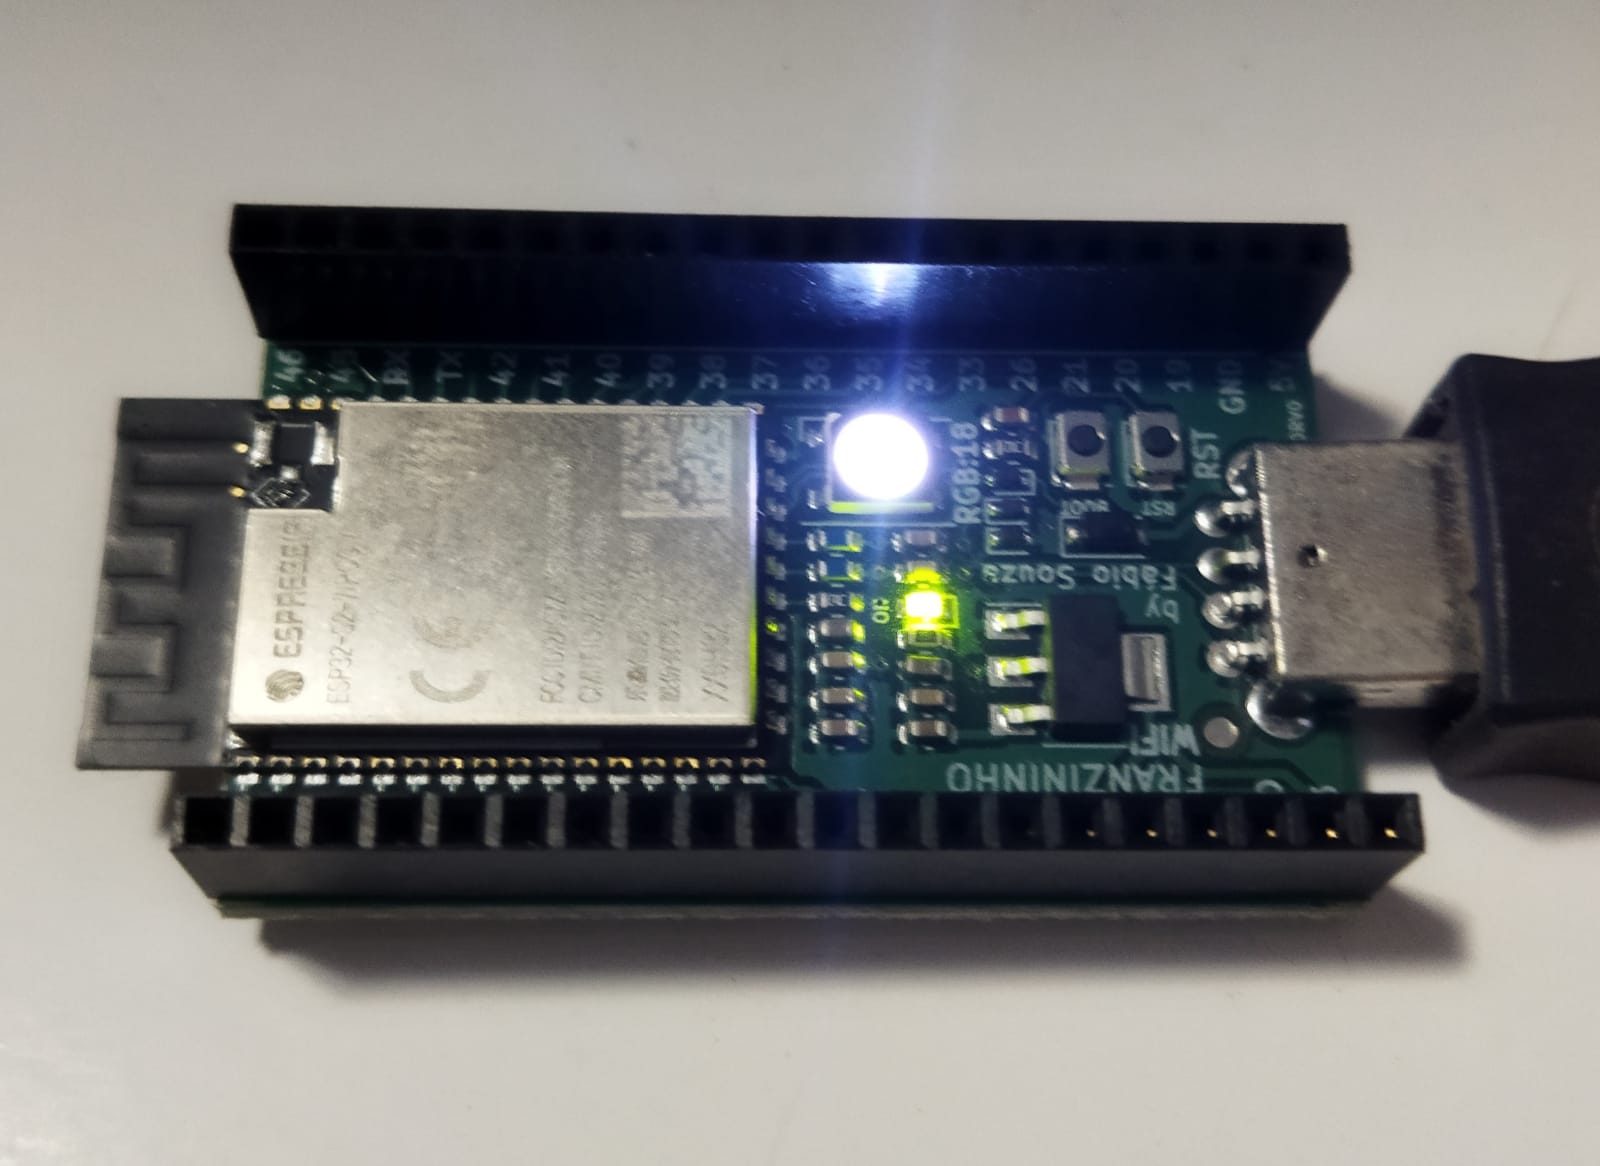
Result of execution on the Franzininho WiFi board.
Another execution example.
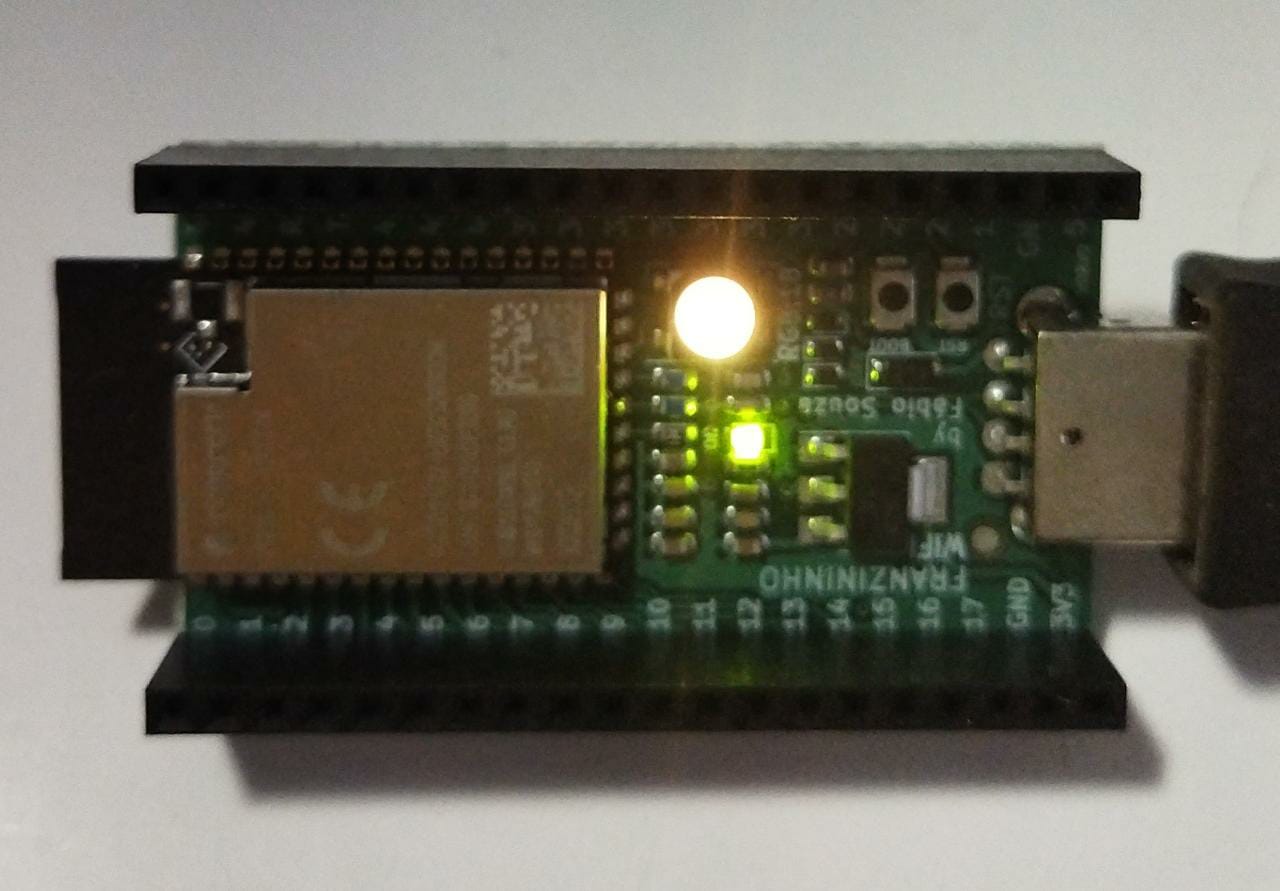
Run it once entering the values [10,10,10], then run it again entering the values [100,100,100] and observe the difference between the two executions.
Conclusion
In this example we explored two important tools in the development of any project: the console serial communication and the built-in LED of the Franzininho WiFi board, which is also a NeoPixel LED that can add extra flair to your projects!
| Author | Ewerton Leandro de Sousa |
|---|---|
| Date: | 07/10/2021 |